
#10 – Eat at a top Michelin star restaurant

I saved myself a treat for the last of my 40 before 40, and I was so excited to be spending the last day of my 30s dining in style. Given my love of food, enjoying my first three Michelin star experience was a perfect start to my birthday celebrations.
There are only 4 three star restaurants in the UK: Restaurant Gordon Ramsay and Alain Ducasse at the Dorchester in London, and The Fat Duck and the Waterside Inn at Bray in Berkshire. I selected the Waterside Inn, which describes itself as a ‘restaurant with rooms’, because I was attracted by its promise of a relaxed and unpretentious atmosphere. I wanted to enjoy great food and fantastic service without feeling uncomfortable or patronised.

The Waterside Inn, Bray
The Waterside Inn was opened in 1972 by brothers Albert and Michel Roux. It gained its first Michelin star in 1974, added a second in 1977 and was finally awarded a coveted third star in 1985. It is the only restaurant in the UK to have held three stars for over 30 years. It is currently run by Michel’s son, Alain Roux, a pastry chef. Alain is only one of three UK based chefs to have been invited to become a Master Pâtissier in the International Association Relais Desserts, demonstrating how highly thought of he is in his field. This honour marks him as one of the world’s best Pâtissiers.
I decided to do this in style, so I booked us a room for the night along with dinner. On arrival, we checked in and I was delighted to find that our room had a four poster bed. I’ve never stayed in one before, so that was very special.

Four poster bed
Once it was time for dinner, we were shown in to the dining room and given a table with views of the River Thames on three sides.

Thames side at the Waterside Inn
As you would expect, every detail was attended to. There was a little ‘footstool’ next to the table on which to place my handbag so that it wasn’t on the floor, every time a glass was emptied it was whisked away immediately and appropriate cutlery was delivered with each course and cleared once we’d finished eating.

Dressed for dinner, ready to experience three Michelin starred cuisine
To dine, we opted for the seven course ‘Menu Exceptionnel’:
Flaked Devon crab with ginger scented cucumber jelly and oscietra caviar
Pan-fried escalopes of foie gras Grenoble style with caramelized slices of orange
Fillet of turbot flavoured with marjoram and roasted in a nut-brown butter, root vegetables and morels, “vin jaune” sauce
A choice of:
Saddle of milk lamb stuffed with morels, served with baby vegetables and a minted hollandaise sauce
Or
Grilled pigeon breasts and crispy leg served with sweet pepper piperade and a potato terrine, devil sauce
Chocolate cannelé with hazelnut praline and lime
Warm rhubarb soufflé enhanced with raspberries
Café et mignardises
I chose the lamb as my main course and David chose the pigeon so we were able to sample both dishes.
With this menu we enjoyed a flight of five paired wines; a white with the crab, a sweet botrytis with the foie gras, a champagne with the turbot, a red with the main course and a dessert wine.

The Waterside Inn, Menu exceptionnel and wine pairings

The Menu
The restaurant does not permit photography, so there are no pictures of the dishes. I’ll have to do my best to describe them for you.
The seven courses were not the whole story! We chose to have kir royale as an aperitif, before starting the evening with canapes, beautifully presented on a rectangular white dish with a carved beetroot rose. We had a cube of pulled pork terrine, a smoked salmon and cream cheese dome and an anchovy puff pastry twist. Small bread rolls were served to us from a bread basket made from actual plaited dough, followed by an amuse bouche of cauliflower soup with a king prawn, served in a miniature tureen.
The crab was served as a small compressed disc topped with the caviar and centred on the cucumber gel. I would not normally choose crab but it was beautifully subtle and the flavour of the cucumber gel was amazingly intense. It was served with a spiced tuile biscuit, which made an excellent platform for the crab.
The foie gras was my favourite course of the evening. It was served pan fried and was meltingly soft. Combined with the sweet citrus of the caramelised orange and a bitter orange sauce it was one of the best things I have ever eaten. The botrytis dessert wine with which it was paired was the perfect complement for the dish. Absolutely outstanding, and hugely memorable.
Had I been choosing from the a la carte menu, I would have been unlikely to choose the turbot, as I generally avoid fish when eating out, but it was a pleasant dish, especially paired with the blanc de blanc champagne. The amazing attention to detail continued here with a small stack of perfectly circular alternate discs of carrot and celeriac, with diced morels in the centre of the stack.
My lamb main course was also excellent. Lovely soft lamb served just pink with perfectly turned miniature vegetables arranged beautifully on the plate. The minted hollandaise which accompanied the dish was another favourite part of the evening. The flavours were excellent together. David enjoyed his pigeon dish, but as I suspected the ‘devil sauce’ was a touch too hot for me.
Before the desserts were served, we were given a palette cleanser of basil sorbet with passionfruit mousse. Once again the flavours were amazingly concentrated for such a tiny morsel, with the sweetness of the sorbet contrasting brilliantly with the sharpness of the passionfruit.
Then came the chocolate cannele. This was my second favourite dish of the evening. A thin chocolate shell, filled with a light hazelnut praline mousse served with just a few tiny caramelised hazelnuts to give a little crunch. It was absolutely delicious.
The meal finished with the soufflé which was, as you would expect, perfect. A lovely toasted pink, standing an inch or so proud of the dish, it sighed gently as the top was pierced for the sauce to be poured in. As we ate our desserts, a firework display started upstream so it was beautiful to watch the fireworks going off and the colours reflecting in the river.
Before coffee we were served a praline milk chocolate selected from a box of chocolates brought round to the table. It was literally a box made of chocolate, and looked like a treasure chest filled with dark, milk and white chocolates.
I was treated to a small slice of coffee flavoured opera cake, delivered with a candle and the words ‘Happy Birthday’ elegantly piped onto the plate. Everything was done with such precision and care.
We chose to accompany coffee with a glass of port, and finished the evening with the beautiful little petit fours served on a small tiered silver stand which included a palmier, an intense chocolate truffle, a miniature lemon madeleine, a tiny raspberry financier, a small traditional sponge cannele and a mint macaron.
We were thoroughly full by then and grateful that we had only to walk upstairs to get to bed. We found more chocolates awaiting us but I’ve had to bring those home as we couldn’t eat another thing!
As a restaurant with rooms, a continental breakfast is served to your room in the morning. I couldn’t think of a better way to start my 40th birthday than with breakfast in bed:

Breakfast in bed
The croissants were gloriously buttery and the pastries included gently spiced ever so soft hot cross buns in honour of it being Good Friday. The pear and rhubarb compote was a welcome addition being sweet and soft and a lovely contrast to the excesses of the pastries.

Pear and rhubarb compote at the Waterside Inn
I felt thoroughly welcomed, relaxed and indulged during my stay, and I’m pleased to have completed the final on of my 40 before 40 challenges in style. A great start my weekend of birthday celebrations.
#19 – Make and wear an item of clothing (not fancy dress)

I included this challenge in The List because I felt that along with all the fun things to do, there should be some things which I learnt from and which resulted in something useful. I chose a sewing challenge partly because I thought it might be helpful to be able to make my own clothes and partly because (a long time ago) I used to make my own dance costumes so I already have a sewing machine and a tailor’s dummy. Other than knocking up the odd fancy dress costume, neither of them have seen the light of day for over 10 years so it was time I actually made use them.
This wasn’t, however, the challenge I was most looking forward to, as you can probably tell from the fact that I’ve left it nearly ‘til last! If the impending deadline of my 40th birthday hadn’t been looming, I probably still wouldn’t have got around to it, but it got to the point where it was looking like it would be the only challenge left unfinished and of course having set myself a target I had to hit it.
I chose to make a dress, because I like dresses and I struggle to find ones which are casual enough to wear to the pub or out for a meal without being too ‘evening dress-y’. This was an ideal opportunity to create exactly what I have been looking for.
I thought because I had some experience of sewing and could use a sewing machine, this challenge wouldn’t necessarily be difficult, just time consuming. How wrong I was. Turns out that although I know how to thread the sewing machine and I have an idea how to sew things together, because I’ve never actually been taught properly (Textiles lessons at school having not entirely usefully involved just three projects: a pencil case, stuffed toys and a pair of tie died boxer shorts), there is a lot I don’t know.
I’m not used to working with a proper printed pattern, as my dance costumes were usually based on something someone else had made so I’d get a one size pattern cut out of newspaper and have to guess whether to cut the fabric bigger or smaller than the pattern pieces I had. I thought that working from a proper pattern, with proper sizing, would be a lot easier. Not necessarily so. Even choosing a pattern was not easy. Looking online was bewildering as there was so much choice and because the manufacturers seemed to assume a level of prior knowledge. I found I needed to actually be able to see the instructions on the back of the pattern to work out how difficult I thought it might be. Luckily, I am blessed with a proper haberdashers in my hometown, and their assistance was invaluable. I was able to pop in, look at physical patterns and then ask their advice about the right type of material, the sundries required and so on.
Having chosen a pattern in a style that suits me – (also the one which had the fewest pattern pieces and no fastenings because I’m rubbish at putting in zips. Fancy dress and dance costumes can be closed via the medium of Velcro, which is a lot easier!) – I bought it home to read it thoroughly and ensure I understood it before diving in and purchasing the fabric. So glad I did. I’m not used to the language and symbols on proper patterns and I needed some help. Before going any further it was off to the library, to borrow books on basics of sewing. (Apparently under the Dewey decimal categorisation system, these are stored not under arts and crafts but instead with DIY. I found them eventually.) One book in particular proved invaluable: “Stress Free Sewing: Troubleshooting Tips and Advice for the Savvy Sewer” by Nicole Vasbinder, literally starting right from the basics of setting up and using the machine, cutting out and marking fabric and understanding patterns, before then going through everything else up to how to use different fabrics and how to finish garments. It was a godsend, without which I would not have got through this project. In fact, without the help of this book and the staff at the haberdashers, I seriously doubt I would have produced anything wearable at all.
Having got the pattern, next I had to choose a fabric. The pattern told me how much fabric and which sundries to buy but I wasn’t sure I understood it so I took the pattern back to the shop with me. Lucky I did. The shop assistant showed me that I had to have a stretch fabric (jersey) and there was a little line on the back of pattern to indicate that the fabric needed to stretch a certain distance. If I’d got that wrong, the dress wouldn’t have stretched enough to go over my head to put it on! Disaster averted. Fabric chosen. Just as I was paying for it, the shop assistant asked if I had the right needles. Right needles? Yes. Jersey is a knitted fabric, if you break the thread the whole thing will ladder, like tights, so you have to use a rounded end (ballpoint) needle. And then there’s the correct thread. 100% polyester for sewing stretch fabrics because apparently that has some stretch in it too. Cotton doesn’t and will either break, cause puckering or restrict the stretch of your garment. I was learning a lot and I hadn’t even started yet! I was so thankful that I had easy access to the haberdashers and its knowledgeable and helpful staff. If I’d just tried to buy all this online without the benefit of advice I’d have made so many mistakes and wasted so much fabric.

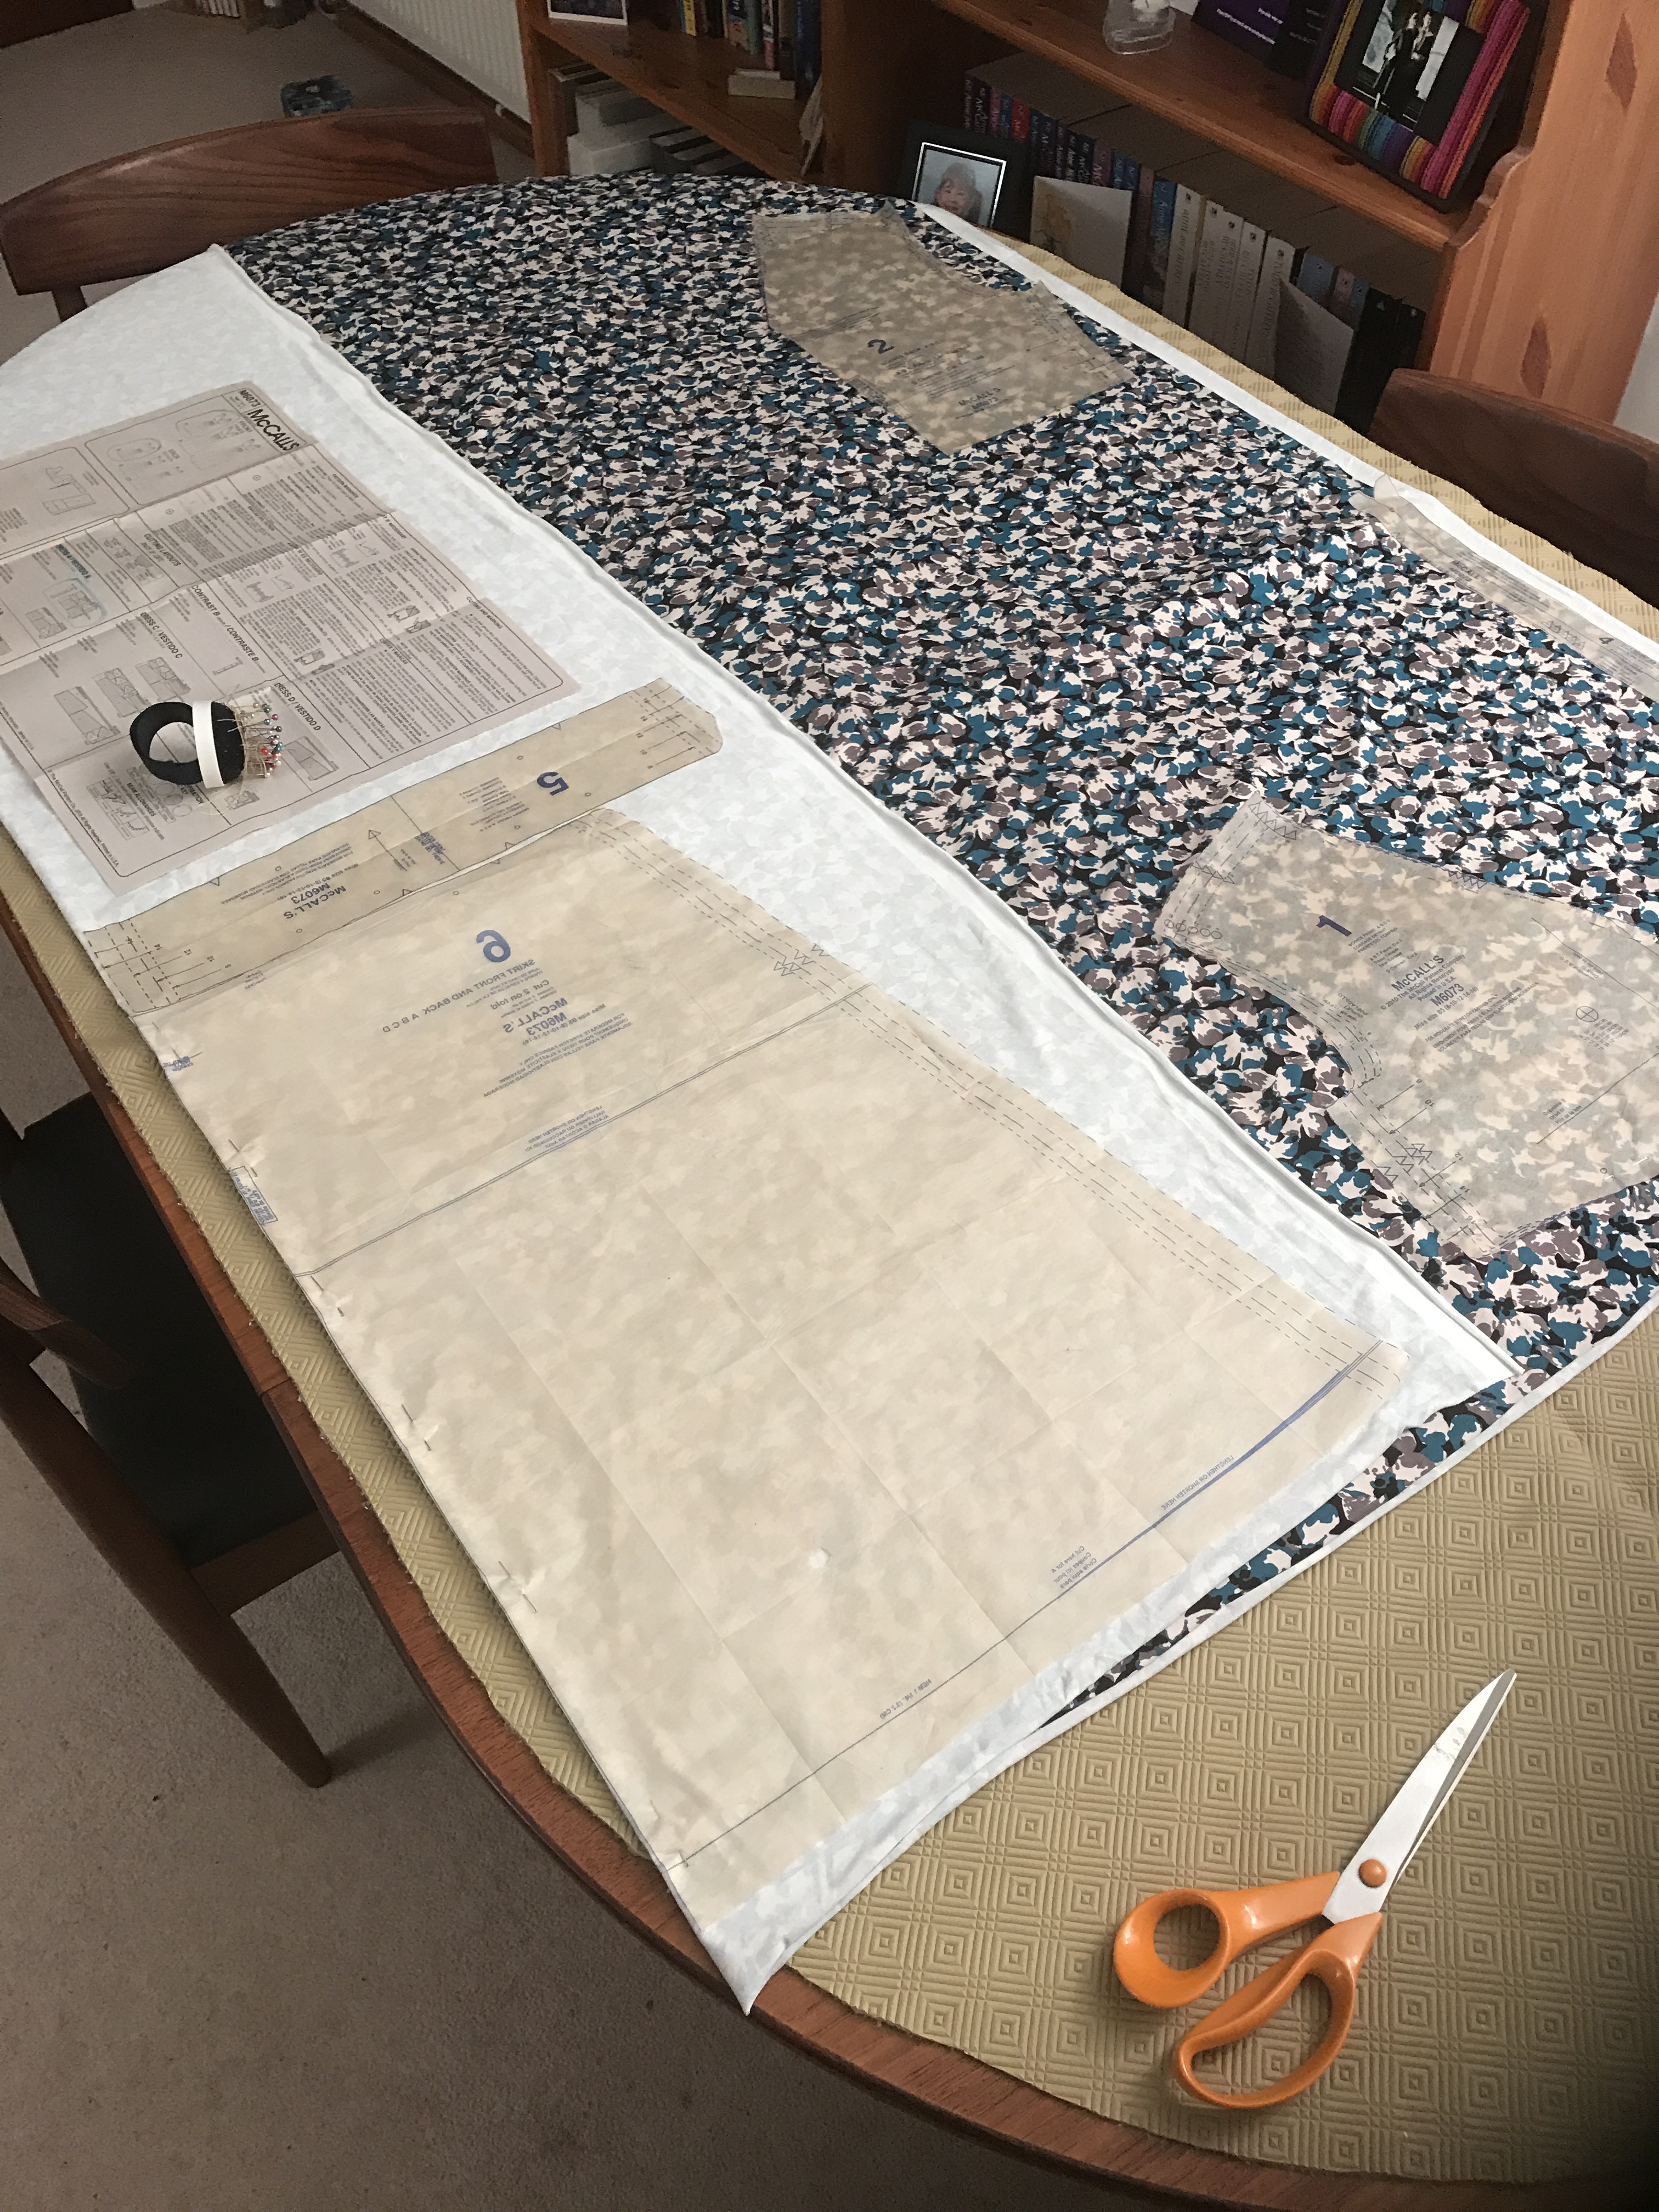
Pattern pieces
The first step towards actually making the dress was cutting out the pieces. I had to check the measurements given on the pattern to confirm which size to cut out, and then remember to cut on that line and not the other four sizes also printed on the same pattern. Luckily the book had warned me not just to go with my normal dress size, stressing that patterns are often smaller than standard dress sizes. (I would have cut too small if I hadn’t read that bit!) It took me about two hours just to cut out the pattern, then another hour to pin it to the fabric, carefully following the instructions about right sides, wrong sides and folds. Luckily I hadn’t chosen a fabric which needed to be pattern matched; I fear that would have been too complicated for me.
I had a bit of a wobble at this point. If I have to use special not-so-sharp needles for this fabric, I wondered, do I have to use special not-so-sharp pins too? Research indicated however, that dressmaking pins were dressmaking pins and that there were not different varieties of dressmaking pins available. I guessed I could therefore use normal pins. I assume this may be because the force of manually pushing a pin into a fabric isn’t enough to tear a thread, but the mechanical force of a sewing machine needle pushing into a fabric is.
Cutting out the fabric
It took me a few days to psyche myself up enough to actually put scissors to fabric. This was the point of no return. If I cut this wrong, I would have to buy more material.
The first piece I cut, I cut slightly wrong. The pattern had little triangle markings all over it. These were ‘notches’ and are intended as markers to indicate where pattern pieces should be matched up with each other. Cut the notches outwards, the pattern said. I forgot. I cut straight along the edges of the pattern, without stopping to cut little triangle notches outwards… Not a total disaster, it just meant that when transferring the other markings from the pattern I had to remember to mark where the notches were too.
Transferring markings was something I’d never done before. Markings are really useful things. They indicate where things should happen or be matched up. For example, my pattern had an instruction to ‘sew a gather stitch between the small circles’. Working from a makeshift pattern, I would have had the garment endlessly back and forth on and off of the tailor’s dummy trying to adjust it to fit. Getting the fit right was so much easier using a proper pattern with these markings.

Putting the bodice together, using the markings
Just the cutting out and marking had taken about seven hours, so I was worried about how long this project was going to take, but it turned out that actually that was the difficult bit. Once I’d started the sewing, the dress went together reasonably easily. I’m familiar with using the sewing machines, but both the pattern and the book were helpful with suggestions about the correct settings for the machine, how to use the seam guides and how to sew the various different hems required. I worked my way steadily through the 23 stages of the instructions and the only section I struggled with was attaching the neck edging because I’d got it confused with a facing and couldn’t understand why the instructions seemed to want me to end up with part of it showing on the right side of the dress. Once I’d referred back to the picture on the front of the pattern, that made total sense; it was, in fact, exactly what I was supposed to do.
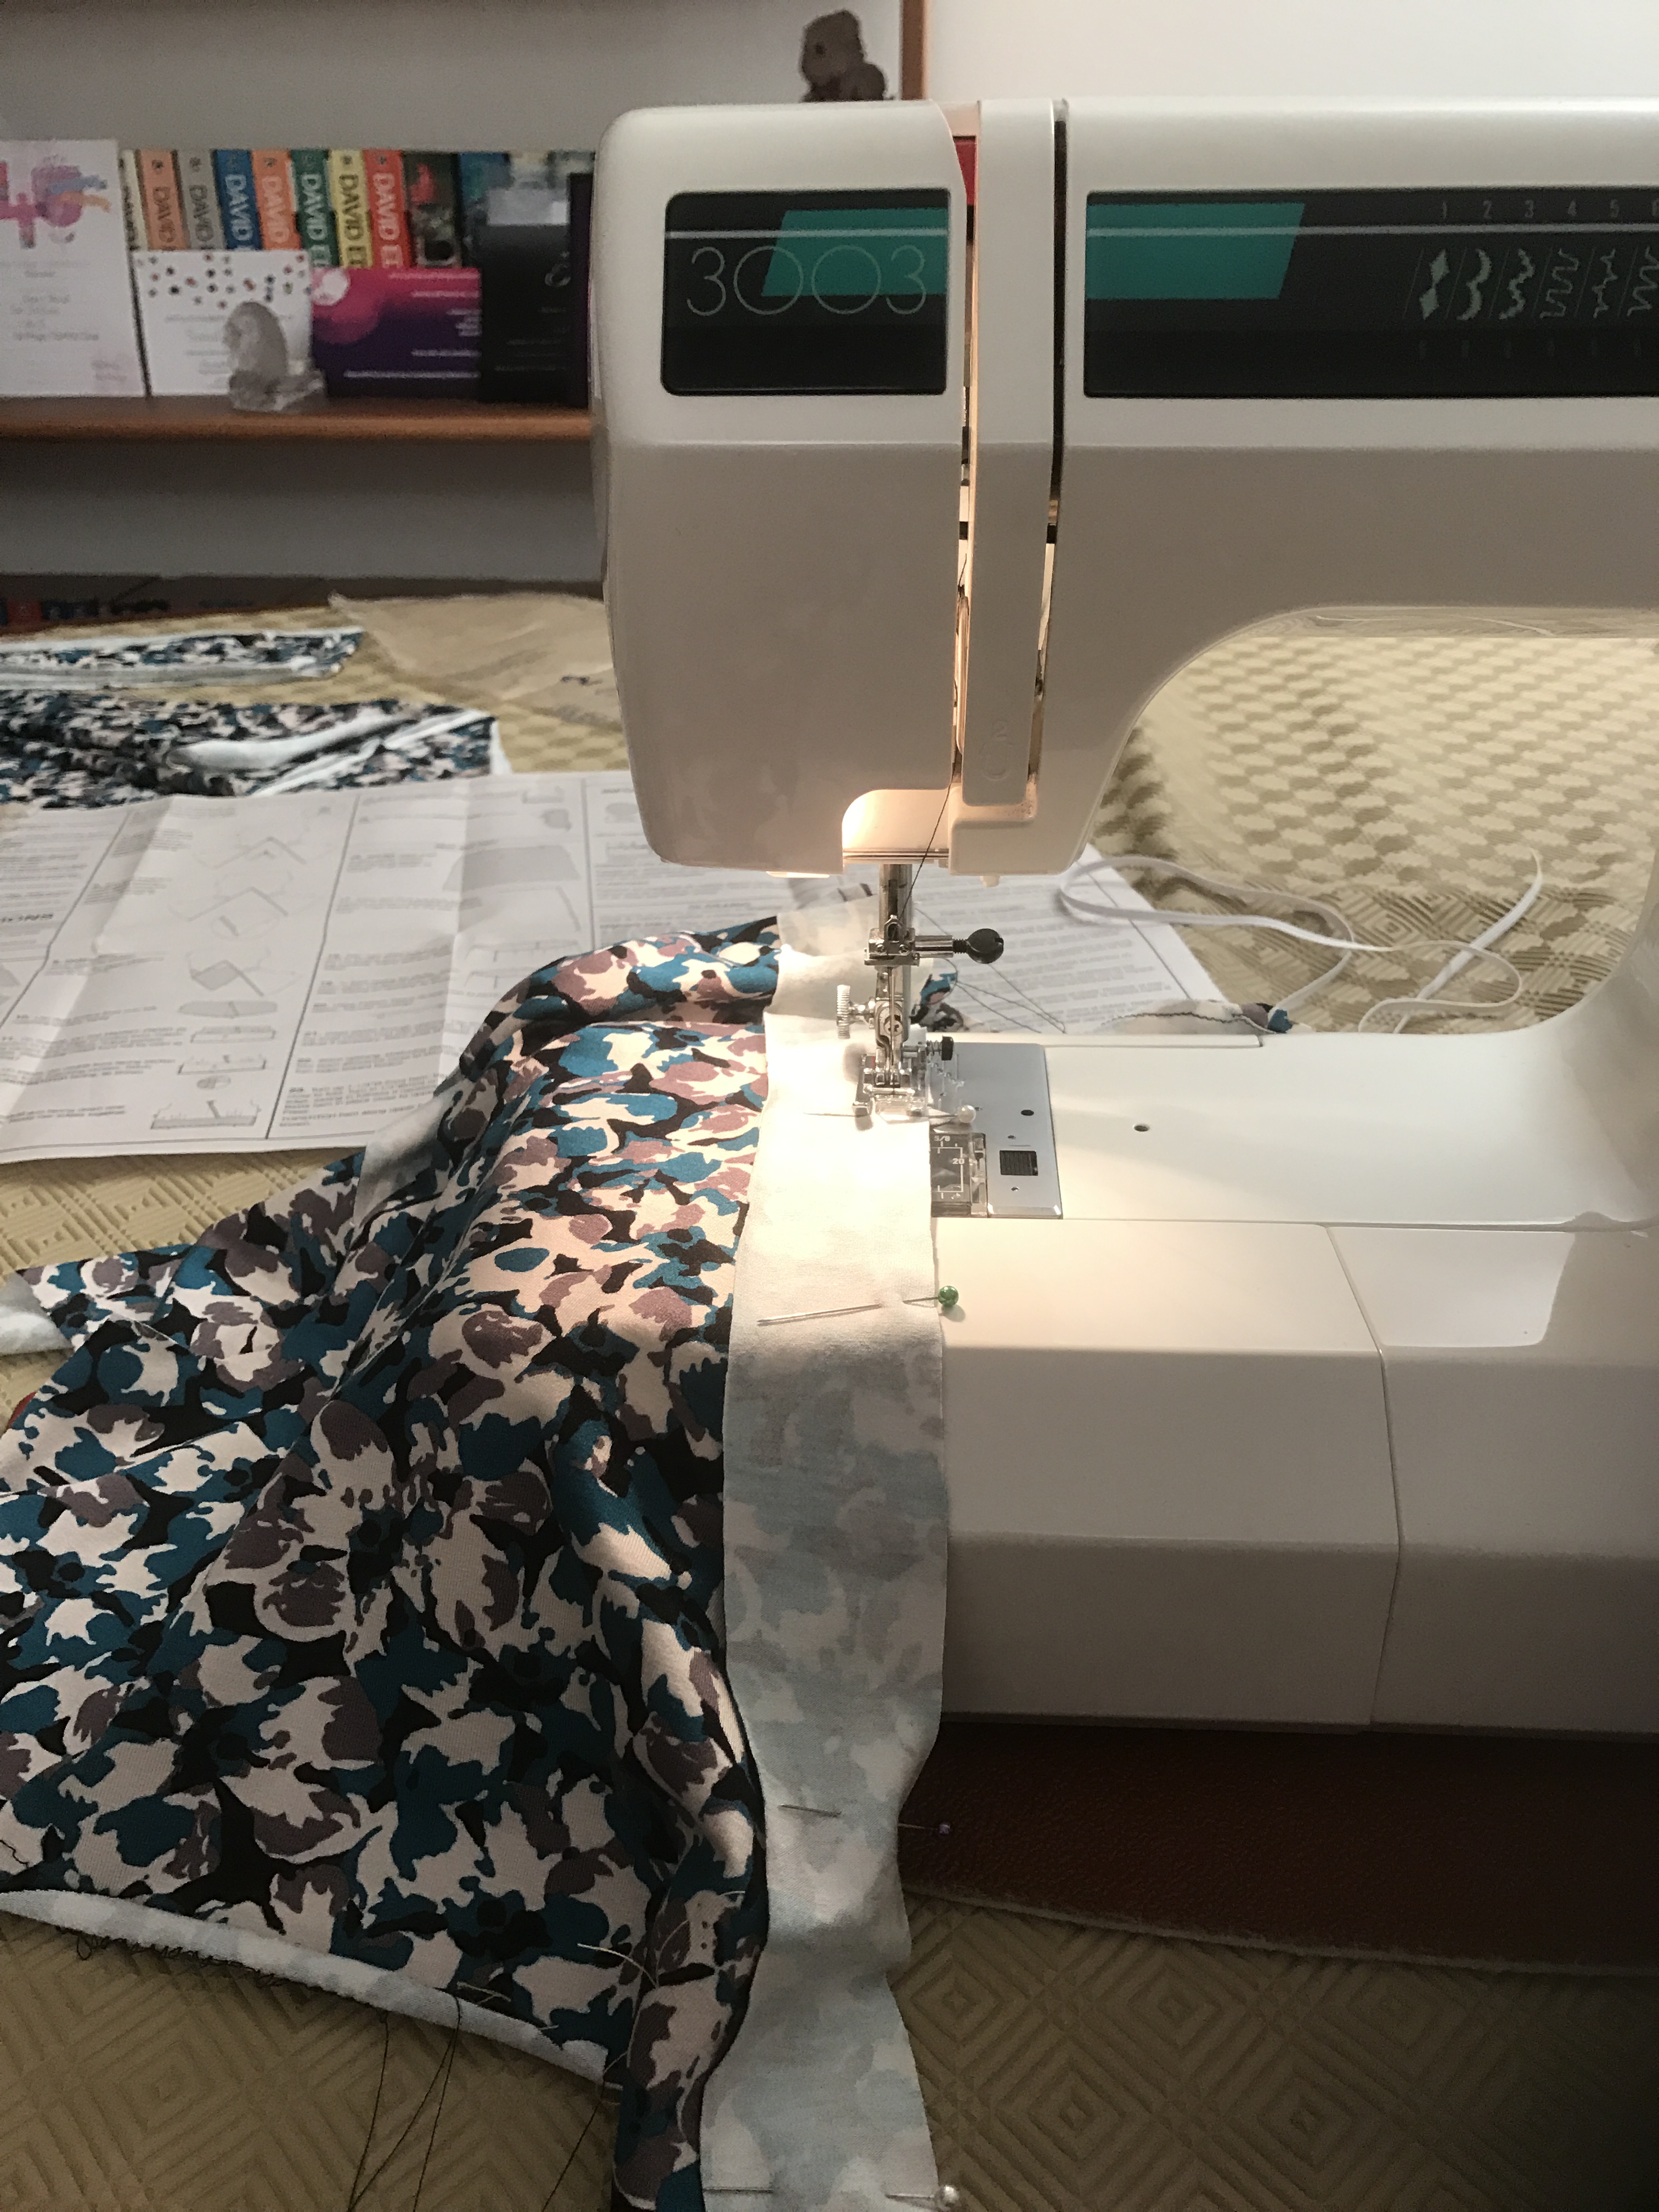
Actually sewing the pattern pieces together
In total, it took about ten hours to sew the dress together, and I was able to use some of the more advanced features of my machine such as elastic stitch (which I didn’t know it had), different feet and the sleeve arm.
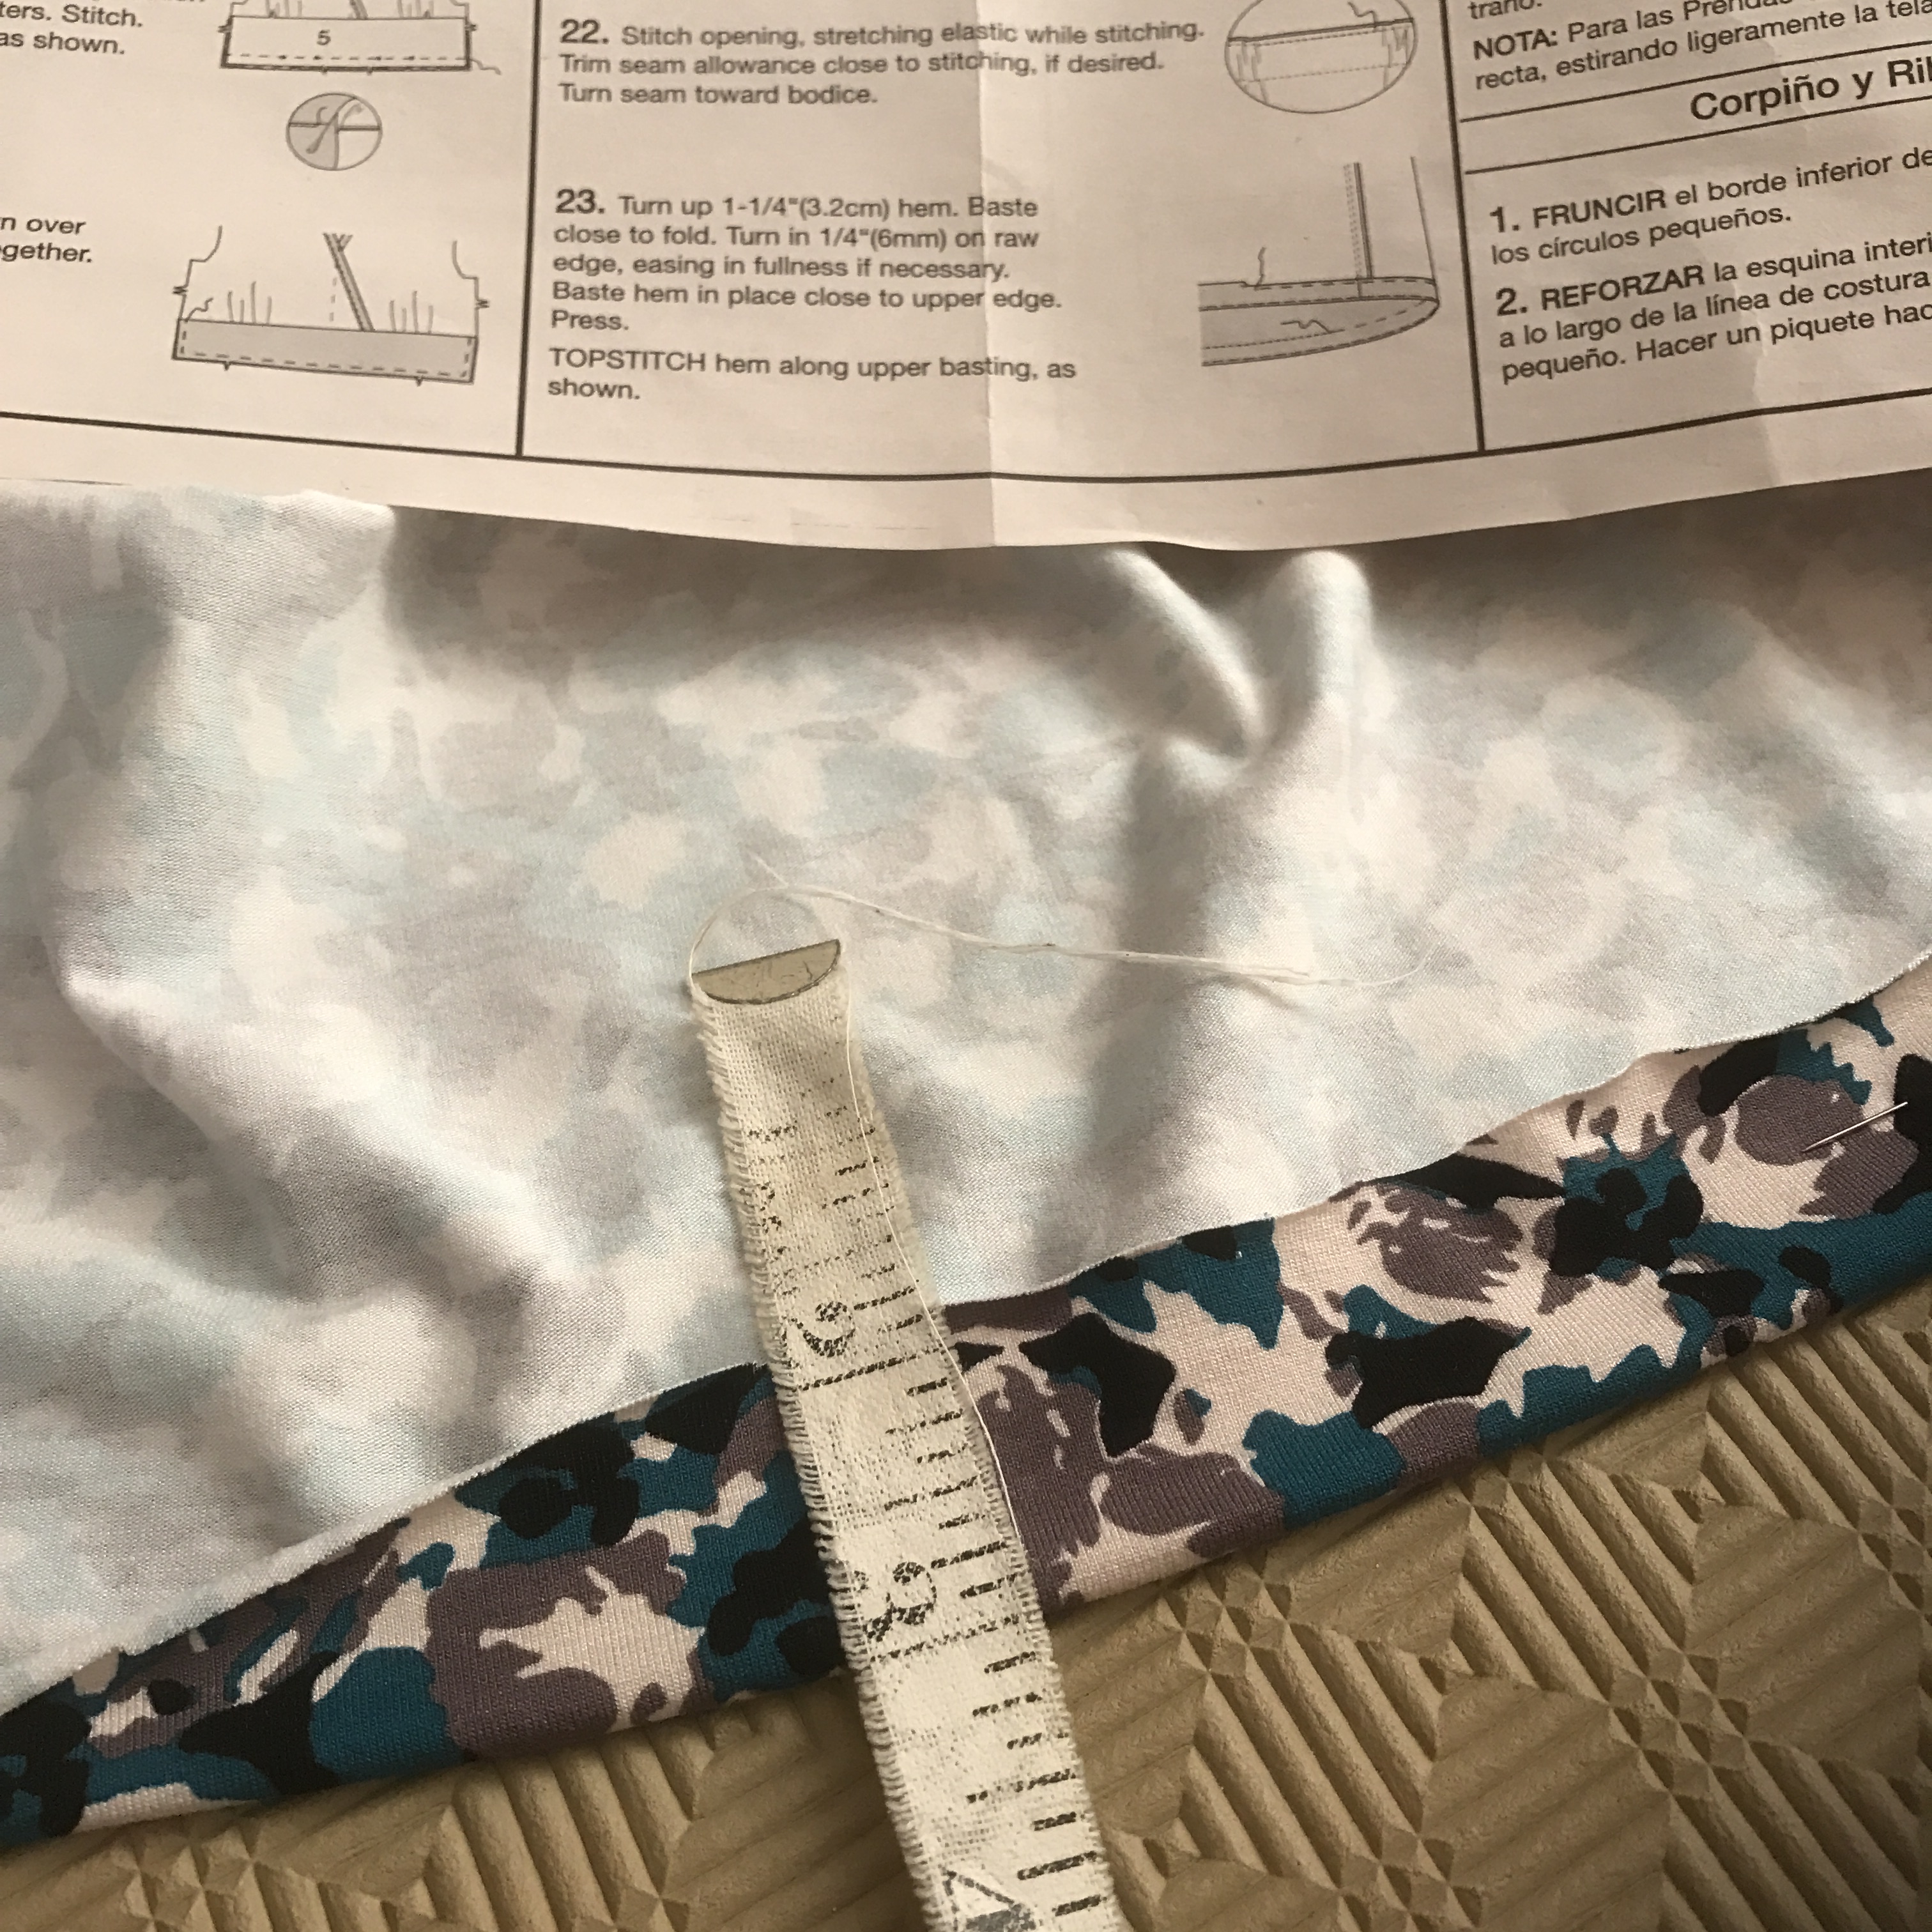
Instruction 23 of 23 – sewing the final hem
The pattern kept telling me to ‘press’ the seams after sewing them. I thought this meant iron them. But no, it seems there is a difference between ironing and pressing. Luckily the book explained this and stressed the importance of pressing when dressmaking. (In case you don’t know either, ironing is moving the iron over something to remove wrinkles, pressing is holding the iron still on a particular part of the garment so that the heat ‘fixes’ it.) Pressing ensures the seams lie flat and fall in the correct direction, making a great deal of difference to the overall neatness and finish of the garment.
I was really pleased with the end result.

The dress! Front and back views
The dress suits me, fits well and looks good. Once I’d figured out using a proper pattern, it was easy enough to do, although time consuming. It’s a lot of fun going out in a dress I’ve made, showing it off and knowing it looks good.

Out and about wearing my dress
The dress has had quite a few outings already; to my sister’s for family tea, to the pub for our regular Sunday afternoon session and out for dinner with the other half. I daresay it will also make an appearance on my birthday weekend. After all the challenge was not only to make the garment, but to wear it too.

Me, in the dress I made
Would I do this again? I’m not so sure. In total, there was about 17 hours work involved in putting this dress together and I don’t have that much spare time so it was a ‘time expensive’ exercise before even taking account of the cost of buying the pattern, the fabric, the thread, the elastic, the correct needles… I spent £42.60 on these things, and the fabric was in the sale so it was 50% cheaper than it should have been. Dressmaking isn’t the thrifty, money saving activity that it used to be. Sadly, if you cost your time, it is much cheaper and easier to buy clothes off the shelf. However, it has demonstrated to me that I can do it, so if in the future I need a garment in a specific style or colour that I can’t buy, I know I’ve got the option of making it. And in the meantime, I have a unique outfit to wear that I can be proud to say I made.
#1 – 48 Recipe Challenge: Recipe 48 – Beef Wellington (and CHALLENGE COMPLETE!)

For my final recipe of this challenge I felt I had better do something worthy of being the recipe on which the task concluded; something technically challenging, something I was a little scared of, something I wouldn’t have attempted when I started this challenge four years ago. Beef Wellington definitely fitted the bill. It’s a dream dish (for meat eaters anyway) but it’s also notoriously difficult to cook. There is no way of checking whether it’s cooked through apart from cutting it open and once it’s cut open you can’t cook it any more without turning it into a totally different dish. And as if that’s not bad enough there’s the perennial problem of the soggy bottom to contend with…
As this challenge has above all taught me to research recipes and read around the method rather than just grabbing a recipe and jumping straight in to trying it, I was grateful to find this Guardian post evaluating different recipes and methods and giving some sound advice on what to do (and more importantly, what not to do):
https://www.theguardian.com/lifeandstyle/wordofmouth/2011/dec/08/how-to-cook-perfect-beef-wellington
Of course, I also checked out a number of other recipes by chefs whom one assumes know what they’re doing (Raymond Blanc, Delia, Michel Roux, Gordon Ramsey for example) but actually I came back to the Guardian’s in the end.
There were two key decisions involved in making the Wellington:
- crepes or no crepes, and
- homemade or shop bought pastry
I was so worried about the soggy bottom I decided for crepes and bought ready-made pancakes reasoning they would be thinner than anything I could make. I also decided for ready made puff pastry in the interests of saving time. (Frankly, I can and have made puff pastry before and I had a busy week. There was no need to demonstrate that I can do that, again.) The advice about getting a good quality all butter puff pastry was worth listening to but finding one proved more tricky. Most of the supermarket puffs (and indeed Jus-Rol which you might assume to be a leader in the field) are made with margarine. Eventually however, I eventually tracked down all butter puff in M&S. (If desperate, I imagine Waitrose probably sell it too.)
Difficult decisions over, the first step in making the Wellington was to make the mushroom duxelle. I fried off chopped onion and mushrooms in a not inconsiderable amount of butter, adding a couple of tablespoons of double cream at the end. I chose to use chestnut, shitake and porcini mushrooms, with the tiniest drizzle of truffle oil as well.
The beef fillet I had bought from my local butcher (who I totally trust to not only give me meat with a good provenance but also exactly the right cut for what I’m doing), and it was indeed a beautiful piece of meat – just look at that marbling:

Beautifully marbled beef fillet and mushroom duxelle
The fillet simply had to be seared in a pan of hot vegetable oil and left to cool. I was very careful to ensure that both the duxelle and the fillet were totally cool before I tried to assemble the Wellington – pastry likes to be cool and any warmth at this stage would simply melt the pastry, meaning it wouldn’t puff. (You’ve seen panicking cooks on Bake Off because their pastry was melting. Well, that wasn’t going to be me.)
Then came assembly time. I looked at the bought pancakes. They looked really thick. I thought about the comments in the Guardian article about the pancakes not being pleasant to eat but the meat-juice-soaked-buttery pastry being extremely pleasant to eat and, at the very last minute, decided against the pancakes. This gave me a bit of an assembly problem as I had been intending to follow the Michel Roux method and use the pancakes to wrap the fillet with the duxelle and chill down so it firmed up. But without the pancakes this was nigh on impossible. Instead I simply unrolled the pastry, spread the duxelle onto it, placed the beef fillet on top and attempted to roll up the pastry in much the same way as you roll a Swiss roll.

Attempting to roll the Beef Wellington

Spreading out the mushroom duxelle
This is not a method I would recommend.
The pastry very quickly came up to room temperature, started melting and became very sticky. (Yes, I know, Bake Off and panicking bakers…. I was there.) It was impossible to turn the Wellington over so I ended up with the seam on top. Nevertheless, it needed to go into the oven before it melted any more, so I rapidly egg washed it, sealed the ends and popped it to cook.
It was then a waiting game….
Waiting for the cooking time to elapse….
Waiting for the Wellington to rest….
Delivering the Wellington to the table…

Beef Wellington – the moment of truth
…
Taking a deep breath, offering up a short prayer and cutting the Wellington…
…
Relief! The pastry was beautifully crisp on top and made a satisfying crunchy noise as it was sliced. The very bottom super thin layer was also crisp, and the pastry above it had soaked up the meat juices and turned beautifully oozy whilst still being cooked. Best of all, the meat was stunningly pink.

My perfect Beef Wellington
I was immensely proud of this magnificent Wellington.
I served it with a simple mustard mash and steamed spinach as I had decided the much lauded accompaniment of dauphinoise potatoes would be too rich. I think I was right. The Wellington was amazing, but boy, was it rich. The beef literally melted in the mouth – no need for a knife to cut it, it pulled apart with a fork (thanks butcher). The mushrooms were tasty, the pastry was great. I went back for a second helping and ate far more than I reasonably should have. Yes, it could have been presented better and I wish I had had time to chill the prepared Wellington before cooking it (and got the seam underneath) but the taste was absolutely bang on.
So, there it is. Recipe 48, challenge complete! Definitely going out on a high with this one.
Scores for my Beef Wellington:
Healthiness – 2/10 (There’s a few mushrooms in this but it’s all about the red meat, butter, pastry… Basically it’s hugely calorific, especially if you eat as much as I did!)
Ease of prep – 7/10 (Actually easier than I thought it would be, especially using ready made puff pastry. Would definitely have benefitted from more chilling time though)
Flavour/taste – 10/10 (Absolutely stunning, I wouldn’t change a thing if I made this again)
It’s difficult to believe that I’ve been working on this challenge every month for the last four years and I’ve actually done it – 48 new recipes made, new ingredients experimented with and new techniques learnt. During that time this challenge has led me down so many new avenues as I initially realised my limitations, then found ways to learn and be more adventurous. It’s made me try new foods, expand the repertoire of cuisines I cook, and made me far less fussy about what I eat. It’s introduced me to a group of ‘Cooking Friends’ I can turn to for all manner of foodie questions and inspiration, it’s made me take cookery classes and it’s made me join a Cake Club. In short it has expanded my diet, expanded my knowledge and expanded my circle of friends – both real and virtual. It’s been so much more than just 48 new recipes, and although it was originally one of the more prosaic challenges it’s one I am so pleased I set it for myself because it has literally changed my life and will continue to do so. So many more recipes to try and techniques to test! The one thing it was meant to do and hasn’t in any way actually done is reduced the huge pile of ‘recipes to try’ lurking in my kitchen – if anything I’ve added to it. But never mind, it’s been a great ride and hopefully my cooking will continue to go from strength to strength.
#31 – Take a Professional Make Up Lesson

I’m not overly confident with make up. I don’t use it much at all, because I think it looks heavy and unnatural on me so I really only wear it if I’m dressing up to go out in the evening. I never wear make up during the day because I don’t know how to ensure it doesn’t look over the top and I’m scared of creating the ‘clown’ look. I’m lucky in that I have reasonably good skin, so don’t really need to use make up to hide blemishes which is probably one of the reasons why I’ve never really learned to wear it. So, what I wanted to achieve with this challenge was to find out a bit more about make up, what works for me, how to apply it confidently and how to create more subtle looks for daytime.
I chose to visit an independent make up artist, which was more expensive upfront, but meant that the session focused on me rather than on the products. As the make up artist (Evie) was not working for a particular brand, it wasn’t in her interest to use lots of expensive products on me in the hope that I would buy them and she would earn commission from the sales. I was really pleased that she used inexpensive products, easily available on the High Street, so if I want to obtain any of them it will be easy for me to do so. I was also able to take my own make up along, so we could evaluate that and see what was working for me and what wasn’t. Given my incredibly small existing collection, there wasn’t really anything which we decided needed to be thrown out!

The sum total of my existing make up collection

The make up artist’s make up collection
(Compare my make up collection with the huge collection that the professional make up artist has!)
The starting place for the lesson was the base. Luckily I have a foundation that I like and that suits my skin. (Since I have really pale skin, it took me years to find a foundation that didn’t make me look orange.) Evie agreed that my foundation worked, so we used that, but not before she’d introduced me to primer, which I’d never heard of before. Apparently it acts as a sort of undercoat, smoothing out your skin a bit before applying foundation. Evie said that for a daytime look, primer could be used on its own. After the primer and the foundation came powder. I never use powder. It’s one of those things which I think makes make up look heavy. Evie explained that it helps to set the foundation and reduces shine, but also stressed that it shouldn’t be used around the corners of the eyes because it can accumulate in the laughter lines there and emphasise them, making your skin look wrinkled and therefore older. That made a lot of sense, and perhaps suggests why it is that I think powder doesn’t work. Clearly it’s all about careful application.

Action shot of the lesson taking place!
Next were the eyes. Evie chose to do one eye as a subtler, daytime look with mainly browns and creams, and the other with a more evening look involving purples, which I had requested as purple is a colour I love. Time for another product I’d never heard of – cream eyeshadow. Evie suggested I use it as a base, because it is smoother to go on, provides good coverage and also ‘sticks’ any powder eyeshadow used on top of it so the powder lasts longer and doesn’t fall off and gather under the eye. One eye was done in a creamy beige, the other in a purpley beige, to give a bit more depth of colour.
We then used my existing eyeshadows in browns and purples to create one subtle and one more dramatic look for the eyes. I could see how using the cream eyeshadow gave a good even base, but also strengthened the colour meaning that you could use far less of the powder eyeshadow yet get better colour coverage than from powder alone. Maybe cream eyeshadow will make it on to my shopping list.
Before we finished with eyes, Evie showed me a different way to put on mascara which involved moving the brush left to right over the lashes and treating the eye as two halves so that the mascara was applied in different directions. This achieved a much more consistent result than my usual ‘dabbing at it with the wand’ approach. A useful new technique learned (if I can remember it next time!). Finally, Evie explained the importance of emphasising your eyebrows as a frame for your eyes – and I could see how, without enhancement, they disappeared a bit, but with some enhancement they really finished the look. Eyebrow gel might be another addition to that shopping list.
Next was blush, and again we used my existing blusher for the evening look, but looked at some softer options for a more subtle daytime look. Finally we played around with a number of lipsticks, trying out different colours to see how they went with the look. It was really helpful to be able to put these on my lips and see them in the context of my full face, rather than just trying them on the back of my hand as you have to do if you’re in the shop.
We finished the session by removing the daytime eye makeup and Evie made that eye up to match the other ‘evening’ eye, as I had requested to finish on an evening look. I was attending a Black Tie Ball that night so thought I might as well make the most of having a professional do my makeup!

Finished look at the end of the professional make up lesson
Throughout the session, as Evie was applying different make up to me she was explaining which type of brush or applicator was best to use and why, which was very helpful, and at the end of the session she created a personalised chart for me showing why products she had used on me and where I could buy them from.

The make up chart showing my recommendations
Overall, the session was helpful but not as inspiring as I had hoped it might be. If I’m honest I was hoping to feel like I felt after having my colours done (Challenge number 15) which really was life changing. After completing that challenge and learning which colours and styles of clothing suited me it’s now much easier and more pleasant to go shopping and I feel much more confident in how I look. However, if I’m honest, this make up session hasn’t made me feel any more confident about using make up. I might buy one or two extra products because I can see that they could be useful and improve my existing evening look, but I’m still not happy about make up for daytime as I feel that it is still too heavy and artificial looking on me. Guess I’ll just have to stay ‘au naturel’!
#1 – 48 Recipe Challenge: Recipe 47 – Fisherman’s Pie

I’m nearing the end of this challenge now – just two recipes to go, so I thought I really had better do something different this time and push myself a bit farther out of my comfort zone. 46 recipes so far; 25 savoury, 21 sweet, a variety of new ingredients and new techniques sampled, largely successfully. But, not one single one of those 46 recipes has featured fish.
Four years ago when I started this challenge I wouldn’t eat fish (or indeed any form of seafood) in pretty much any format other than fish fingers. Even the smell of fish made me gag, there was no way I was going to put it in my mouth. In my world, going to the fish and chip shop for tea actually meant chicken pie and chips for tea. I blame the fish van which used to come to our village on Fridays and sell Mum bright yellow smoked haddock which we’d then have to have for dinner. I’m sure it probably wasn’t actually every Friday of my childhood, but it felt like it. As soon as I had a choice about what I was eating, fish was out.
However, when I booked my trip to Japan (Challenge 2), I realised it would be sensible to train myself to eat at least some fish and seafood in order to properly experience Japanese cuisine, and then the Chinese and Thai cookery course I took for Challenge 33 introduced me to cooking with prawns. After that I got really brave and on two occasions have actually ordered fish in restaurants (always a risk because if you don’t like it you’ve still got to pay for it). Most recently I had Gurnard in a Bacon and Mussel Sauce from River Cottage Canteen. It was absolutely to die for. (I’m still scared of fish if it has a head and tail mind you, mainly because I have no idea what to do with it, and having tried both mussels and oysters I’m sticking with prawns! But at least I’ve given a few more things a go.)
I do occasionally cook a cod fillet at home when I am trying to eat very low calorie meals and am fed up with chicken, but in that case I generally drown it in a ratatouille so I can’t actually taste the fish. For this month’s recipe however, I wanted to choose a dish that made the fish the star. I turned to a classic; a good, old fashioned Fisherman’s Pie and of course it had to be a Delia recipe I followed for such a traditional dish.
A cheffy friend gave me three tips when I mentioned that I was going to be making a fish pie. They were:
1 – Poach the fish in milk to cook them then use that milk to make the béchamel sauce.
2 – Smoked haddock is a must.
3 – Dot cubes of mozzarella amongst the fish sauce before you put the mash on top.

Fish fillets ready to be poached
I was relieved to see the Delia recipe (taken from her Complete Cookery Course) did indeed require me to poach the fish in milk and then use that milk for the béchamel, but smoked haddock? My childhood nemesis…. I decided that if I was pushing myself I might as well do it properly, so smoked haddock was in – along with cod and hake.
Assembling the pie was actually quite time consuming with lots of processes required. It reminded me a little of putting together a lasagne in that there was quite a lot of work to get through before really getting anywhere; the fish had to be cooked through, the potatoes and eggs boiled, potatoes mashed and a béchamel sauce made all before actually starting on the construction of the pie itself. None of those processes were especially difficult though, so I worked my way through them and was then ready to start assembling my pie.
First the sauce in the bottom, complete with prawns, the flaked fish, parsley, and chopped boiled eggs.

The base for the Fisherman’s Pie
Here I deviated slightly from the recipe. I left out the capers in Delia’s recipe because I think they’re a dominant flavour and I suspected they would overpower it, and I added the cubed mozzarella as suggested by my friend, basically on the grounds that I really don’t think it’s possible to have too much cheese so adding it to a recipe isn’t going to do anything other than improve it.

Fisherman’s Pie – ready to go into the oven (with super neat mashed potato topping)
Next I had to layer the mash over the top, smooth it out and (for some reason) pattern it with a knife. Since I knew I’d be photographing it, I made a special effort to make it neat. I hope you’re suitably impressed.
All that remained was to scatter over some grated Cheddar cheese and then bake it.
I was rather pleased with how it turned out. Nicely browned on top without being burnt (a minor miracle with my appalling oven):
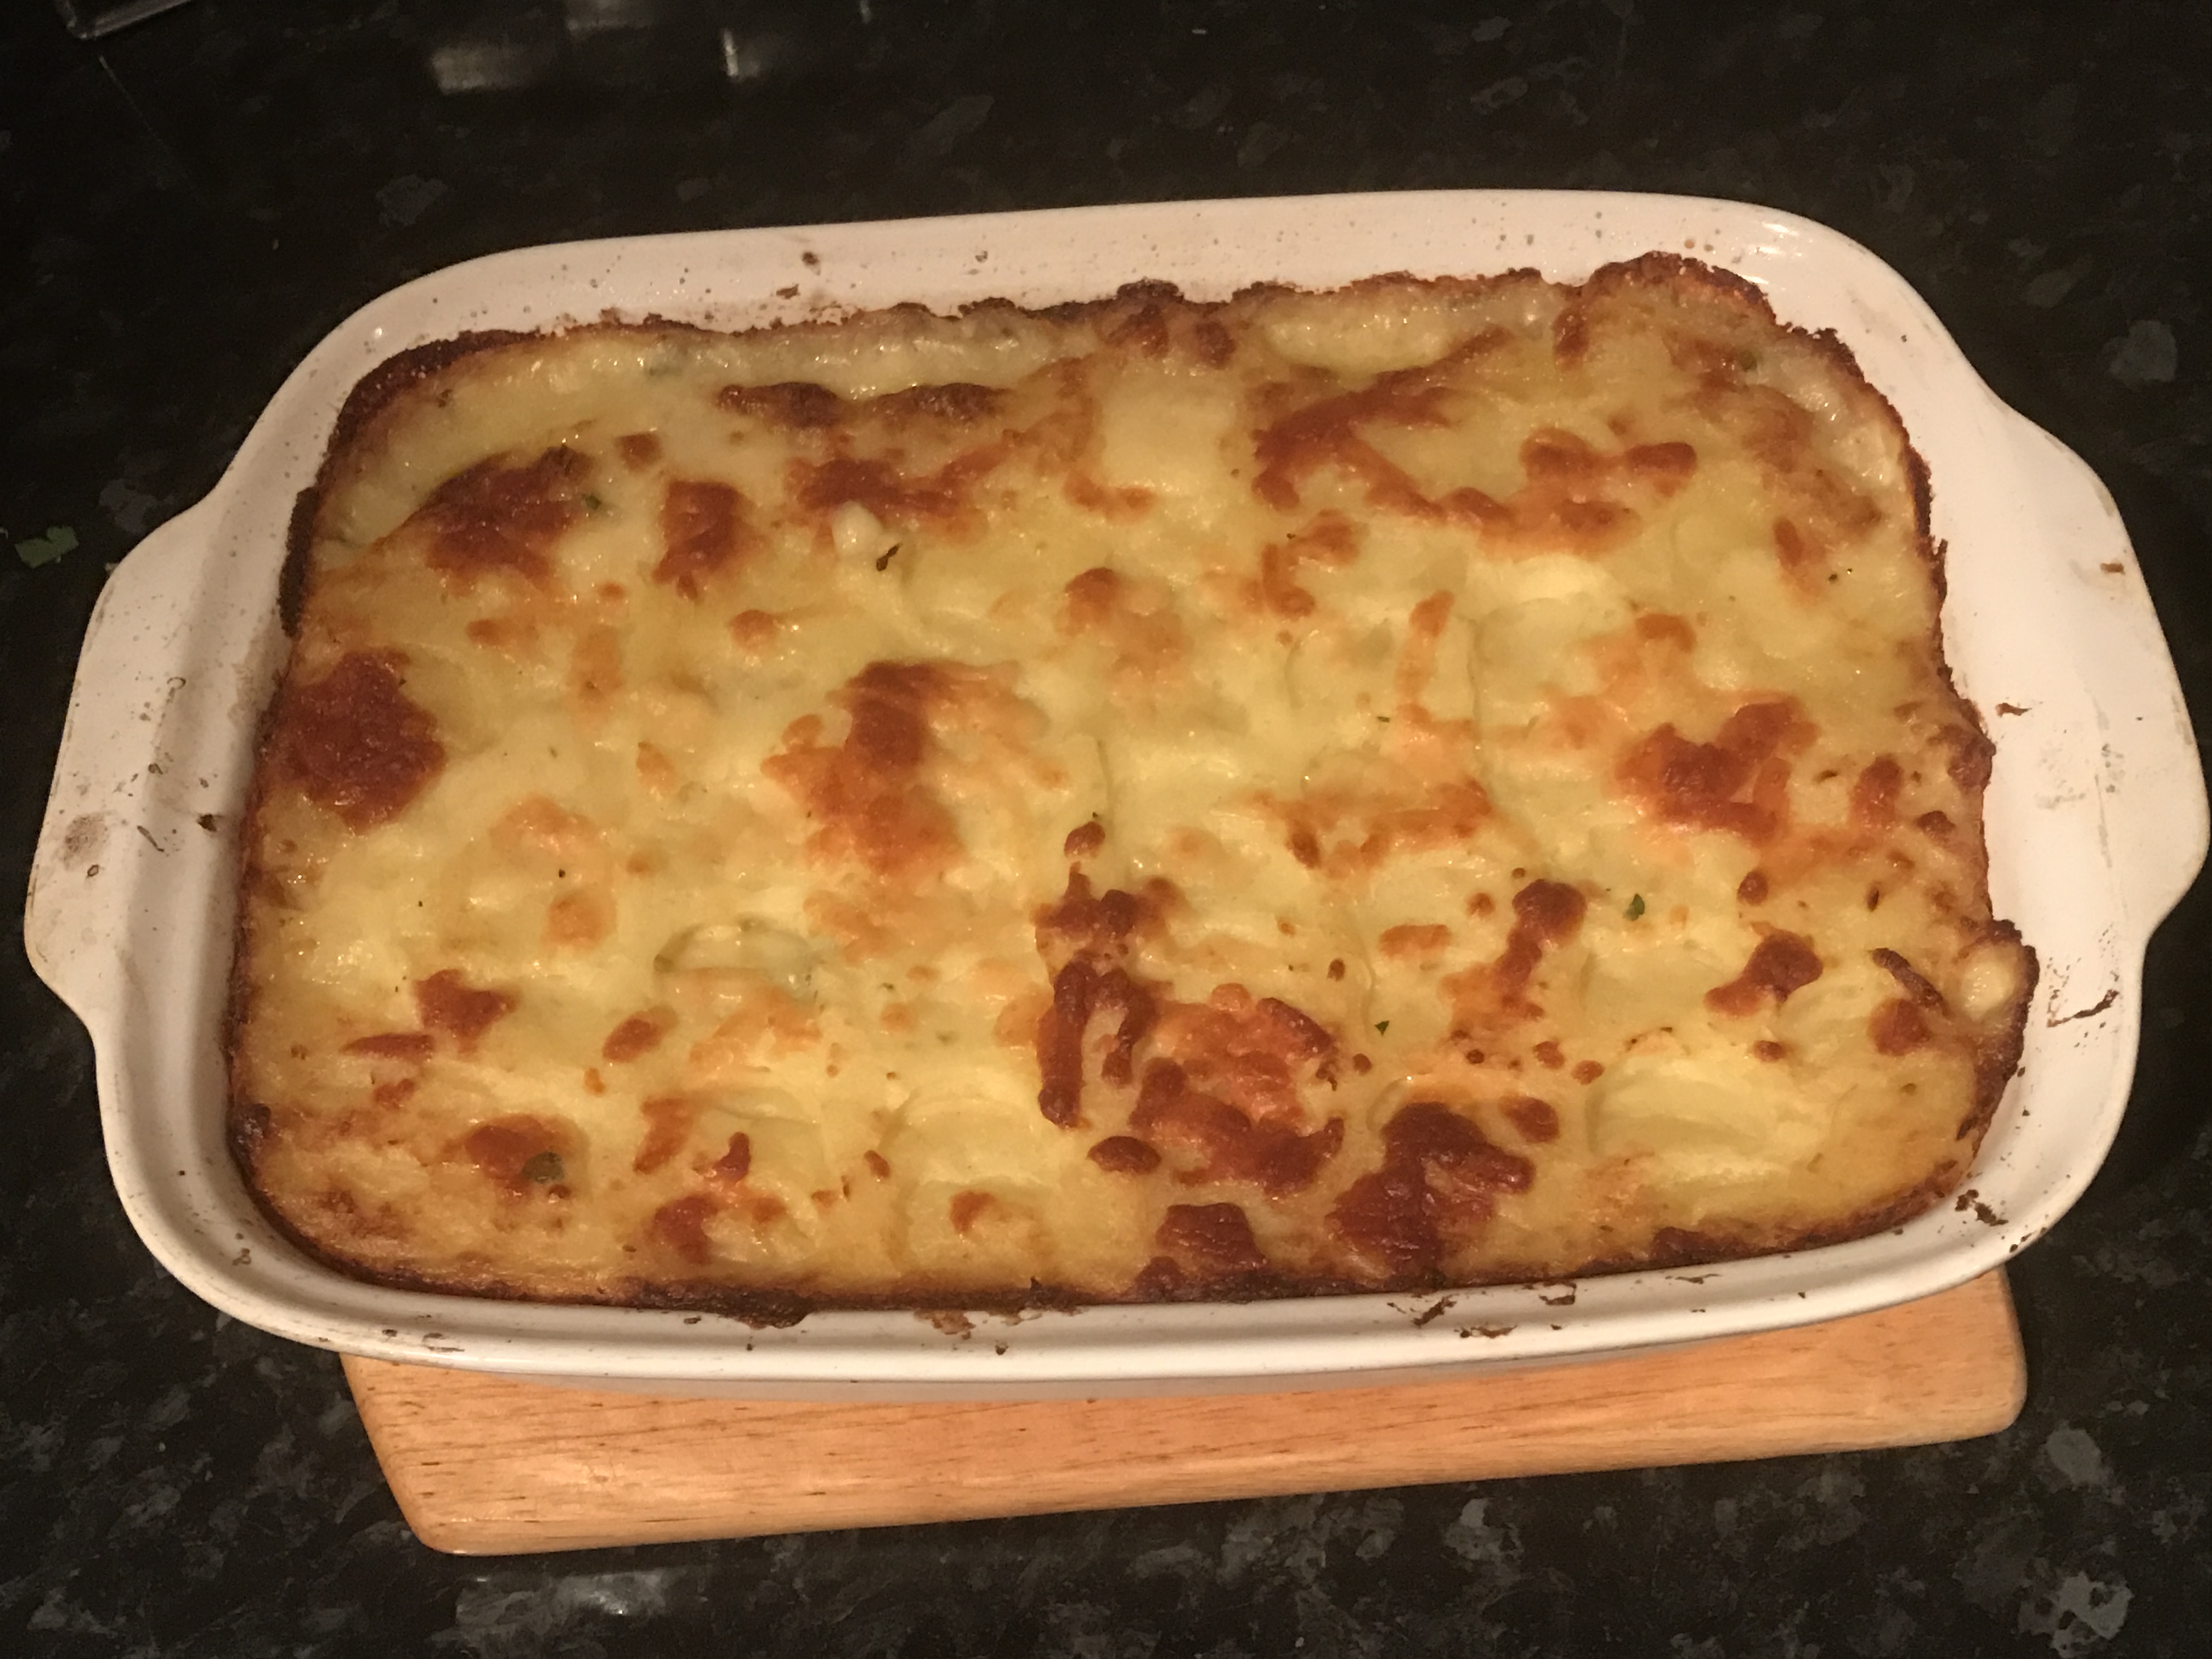
The finished Fisherman’s Pie
I served it simply with steamed broccoli, and we loved it. It was oozy, creamy, comforting… I’m really pleased that the recipe generated a huge quantity so there are now several portions in the freezer to treat myself to another day. A great success for my first proper attempt at cooking fish, and I even enjoyed the smoked haddock. Perhaps I’ll try a few more fish recipes in future.
Scores for this one are:
Healthiness – 5/10 (Yes, the fish is good for you but there’s A LOT of butter and potato in this recipe)
Ease of prep – 5/10 (The processes aren’t difficult, there’s just quite a lot of them so it takes a bit of time)
Flavour/taste – 10/10 (Just sooooooooo good. Proper comfort food)
The actual recipe I used isn’t available online, but this one shares the same base. Don’t forget to add the mozzarella! http://www.myhungryfriends.com/fish-pie/
#1 – 48 Recipe Challenge: Recipe 46 – Tarte Tatin

Part of the reason for setting myself this challenge of trying to cook new recipe every month was because there are a number of classic recipes which I have never attempted because I am a bit scared of them. I thought this challenge might force me to give them a go. Tarte Tatin was one such. It’s French, it sounds fancy, I have an idea you need special Tatin tin. All of which is screaming ‘difficult’ to me. However, I’ve always been a bit intrigued by a Tatin and in that vein, I even wrote it on a (very short) list of recipes I wanted to try and tackle during this challenge. And here we are, up to Recipe 46 of 48, and I still haven’t attempted a Tarte Tatin… This month it was time to try.
If I think of a Tarte Tatin, I instantly think apple, and apparently that is the classic flavour. I erroneously assumed that Tatin was in some way French for ‘apple’, but it turns out that Tatin was simply the surname of the proprietors of Hotel Tatin, which is credited with either inventing or popularising the dish (depending on whose account you believe). A quick recipe search however, reveals a number of interesting sounding variations, both sweet and savoury, on the Tarte Tatin theme; ‘Plum and Marzipan’ or ‘Red Onion’ both caught my eye. But I was running before I could walk. I needed to try a classic apple Tarte Tatin first and as luck would have it my copy of Nigel Slater’s Real Good Food had a recipe in it. And, even better, Nigel expressly told me that I didn’t need a specific Tatin tin and could use a normal cake tin or even, in extremis, a frying pan.
Making a Tarte Tatin sounded simple enough. Make the caramel with butter and sugar, add the apples, top with pastry, then bake. Pastry isn’t a problem for me and Nigel’s recipe used an enriched shortcrust (with egg yolks and sugar added) so that was easy to put together. Caramelising the butter and sugar was a bit more tricky though. I couldn’t remember whether you’re supposed to stir it or not supposed to stir it and Nigel didn’t include any instructions on this point.
I stirred it.
I suspect I shouldn’t have done.
Nigel’s recipe called for a golden caramel. By the time I’d finished wondering why mine was taking hours and turned the heat up to make it melt quicker it was decidedly brown. I was worried it would be burnt and bitter but a quick taste test once it had cooled and it didn’t seem to be, so I pressed on. (As an aside, I made the caramel in a saucepan and poured it into the cake tin as I wasn’t entirely convinced a cake tin could take the heat of the hob without warping. It didn’t seem to affect the end result.)

Apples and Caramel
Arranging the apples atop the caramel was simple enough, as was rolling out a disc of pastry, draping it over the apples and tucking it in around the edges before popping the whole thing into the oven. I’ll admit to being a bit nervous turning it out but it had shrunk away from the edges of the tin and didn’t look like it would stick, so I plonked a plate over it and bravely inverted it.
E voila! Apple Tart Tatin

The finished article – Apple Tarte Tatin
Served up with a little crème fraiche, it even looked reasonably respectable.
It tasted much as I expected it would. I was not delighted by the pastry, which I felt was a little heavy. In fact, there is a degree of debate about whether a Tatin should use shortcrust or puff pastry, and I think based on this particular recipe I would possibly come down on the side of puff pastry. I also think it would have been good to have slightly more oozy caramel as the tarte wasn’t as sticky as I had hoped it might be. But, I had made a Tarte Tatin and it hadn’t been anywhere near as difficult as I thought it might be. I might even be encouraged to give it another go and try some other flavours.
The recipe I used isn’t available online, but this excellent article reviews the different methods of making a Tarte Tatin and gives a great sounding recipe to try, should you wish to give it a go yourself:
https://www.theguardian.com/lifeandstyle/wordofmouth/2011/oct/20/how-to-cook-perfect-tarte-tatin
My scores for the particular recipe I used (from Nigel Slater’s Real Good Food) are:
Healthiness – 2/10 (Yes, OK, it’s got fruit in it but it’s also got so much butter, sugar and pastry that I don’t even want to think about the calorie and fat count!)
Ease of Prep – 5/10 (Pretty easy to do if you’re OK with pastry, especially since it turns out you don’t actually need a special tin. Just don’t burn your caramel.)
Flavour/taste – 7/10 (It was good but not amazing. I’ve made better desserts. It did also taste great cold the following day thought.)
#35 – Visit all the UNESCO World Heritage Sites in England: Durham Castle and Cathedral and CHALLENGE COMPLETE

Durham Castle and Cathedral perches atop a rocky promontory around which the city of Durham has grown up. Listed as a World Heritage Site for its outstanding Norman architecture, which is considered as among the best in Europe, it is also believed to be one of the country’s greatest monuments to the Norman Conquest. The site comprises Durham Cathedral built from 1093 to house the remains of St Cuthbert (former Bishop of Lindisfarne), Durham Castle and the buildings around the square which encloses these two buildings, known as Castle Green. Unfortunately the Castle now belongs to the University of Durham and part of it is used as Halls of Residence so opportunities to visit are very limited, although Castle Green and of course the Cathedral itself are accessible. The role of Durham’s Prince Bishops, unique in the medieval church hierarchy, is interesting but not central to the World Heritage listing – see my note below for more information.

First view of Durham Castle and Cathedral, high above

Norman Arches in Durham Cathedral
I took a tour of the Cathedral, which talked not only about the founding and history of Durham Cathedral, but also the architectural features and its famous inhabitants. In addition to housing the shrine of St Cuthbert, Durham Cathedral is also the burial place of the Venerable Bede, known as the father of English History. Whilst there, I also visited the new ‘Open Treasures’ exhibition which shows off the Cathedral’s surviving monastic buildings. Sadly at the time of my visit it didn’t showcase the St Cuthbert relics, but it will do so at some point during 2017, which I’m sure will be fascinating.
Here’s a photo to prove that I did pay a visit:

Me at Durham Cathedral
The Cathedral itself was built to house the remains of St Cuthbert with legend telling that that particular spot was chosen because a delegation of monks carrying St Cuthbert’s coffin said that it became so heavy when it reached Durham that the monks assumed that was where the saint wished to rest. The coffin was allegedly set down and a Cathedral built around it. Certainly the cathedral was built ‘backwards’ as it were. The construction of the shrine predates the construction of the main part of the Cathedral.
For me, one of the most striking features was that the interior of Durham Cathedral is markedly darker than most Cathedrals I have visited. This is due to the Norman architectural style, which used small, rounded window arches rising in tiers. In construction terms, the windows are the weak points in the walls and the rounded Norman arches could not support great weight, meaning that windows had to be relatively small. As Cathedral building developed, it was realised that pointed arches could take greater weight, hence the move towards pointed Gothic arches and larger windows, to let more light into Cathedrals; light being associated with God and ‘goodness’.

Durham Cathedral’s pillars, with geometric designs
Walking into most Cathedrals, your eye is drawn immediately upwards due to their perpendicular architectural style, but this is not the case with Durham. The most distinctive feature of Durham cathedral, for me, was the pillars decorated with geometric patterns. This is not something I recall seeing elsewhere and is apparently a feature of Norman Cathedral design.
As I was walking around Durham Cathedral I was reminded of the brilliant ‘Pillars of the Earth’ by Ken Follett, which I read as part of the BBC 100 Books Challenge, telling the story of Europe’s Cathedral builders and how they constantly tried to improve their building techniques because what they were building were temples to the glory of God so they were constantly striving to make them even more glorious. The contrast between the slightly squat Norman architecture and the Gothic style which followed it is well illustrated by comparing Durham with other Cathedrals.
This tour of the furthest north of the English UNESCO World Heritage sites wrapped up my trips to these sites. So that’s Challenge number 35 completed, and thirty six of my 40 before 40 ticked off. In my lifetime, I have now visited all seventeen of the English UNESCO World Heritage sites, seen some amazing things and learnt so much. My favourites were the places which meant learning from my school days suddenly made much more sense – the Derwent Valley Mills, Ironbridge Gorge and the Jurassic Coast. Maritime Greenwich was a fabulous day out and I fell in love with the grand architecture and fascinating history of Liverpool. Many of these places I wouldn’t have visited were it not for this challenge, and I’m really glad I included this one in The List. With all the foreign travel I do, it’s brilliant to appreciate what I’ve got at home too.
A Note about Durham’s Prince Bishops:
Durham’s Prince Bishops played a highly unusual role in medieval society. The role was created essentially because the Kings of England (from William the Conqueror onwards) needed to ensure that Northumbria remained loyal to the crown in order to protect the northernmost reaches of the English kingdom from invasion by the Scots. Consequently appointments to the see of Durham were initially given to those who favoured the King and the Bishops developed a close relationship with the local earls of Bamburgh to ensure the area was well defended. From the late 1080s, Northumbria was divided and the area south of the Tyne became the County Palatine of Durham, now known as County Durham. The role of Earl and Bishop was combined and from that point on the Bishop of Durham effectively ruled in this area, having many of the powers of the King including being able to mint coins, grant charters, levy taxes and even hold his own parliament. This is a role which was unique in the country and marked the strategic importance of Durham in maintaining English sovereignty.
#1 – 48 Recipe Challenge – Recipe 45: Meringue Wreath

A lovely festive recipe this month, taken from the BBC Good Food website. I chose this one because when I was invited to join a friend for an unconventional Christmas Day lunch of Beef Wellington (which she cooked beautifully), I offered to take along a dessert. Something other than the traditional Christmas Pudding was preferred so I decided to make a Meringue Wreath. Light, fruity and pretty as well, it fitted the bill perfectly.
Luckily for me, the meringue could happily be baked two to three days ahead which was extremely useful amidst the chaos of Christmas preparations. It was very simple to whisk up the meringue with my electric hand mixer and as I made it up in the evening, I could cook it for its allotted 90 minutes and simply leave it to dry out in the cooling oven overnight. (Apparently this is done because meringues essentially need to dry out rather more than bake so long exposure to low heat is best.) In the morning, I wrapped it in cling film and stashed it safely out of harm’s way (in the spare room!) so that it wouldn’t get broken whilst I was doing lots of other Christmas cooking in the kitchen.
On Christmas Day itself all I had to do was actually decorate the meringue. I simply added a dob of whipped cream to the top of each of the meringue blobs, then peeled and sliced the clementines, sweetened the cranberries slightly by briefly cooking them with some sugar (I did add a little water to the pan as well as I was worried I’d end up with a solid cranberry caramel otherwise), chopped the pistachios and arranged the fruit and nuts onto the cream.

Meringue Wreath with clementines, cranberries and pistachios
I loved the jewel bright colours of this particular recipe; it really did look like a Christmas wreath. The combination of clementines and cranberries resulted in lovely Christmassy flavours but of course you could substitute any fruit you prefer. Berries would work well too, perhaps with some mint leaves to add a touch of greenery. The one tip I would give you is: don’t make the meringue bigger than any serving plate you own! The fact that I had done this made it rather difficult to transport the wreath to my friend’s house, and also to serve it. At one point I thought I was going to have to serve it on the baking sheet I cooked it on! Fortunately I managed just about to squish it onto a plate without breaking it too much. I had used a standard size plate as the template for the meringue, but of course it spread slightly when it cooked. I realised that what I should have done when spooning the meringue mix onto the baking parchment was to ensure the circle template I was using was at the outside of the meringue blobs, not place the meringue mix on the middle of the line.
If you’re not a fan of Christmas pudding, or want a light dessert to include in a Christmas buffet, this recipe is ideal. Here’s the link in case you want to try it: http://www.bbcgoodfood.com/recipes/clementine-cranberry-pistachio-meringue-wreath-0
I think it would also be possible to adapt this recipe to make little individual wreaths, but in that case it would probably be best to pipe the meringue in small circles onto the baking sheet, rather than blobbing it on as it would be hard to create a good shape.
Scores for this recipe are:
Healthiness – 6/10 (Meringue contains a lot less calories than most other Christmas desserts, even with the cream on top, and of course there’s the fruit too so you’re getting some of your five a day)
Ease of prep – 9/10 (Perfect for this busy time of year – meringue is not complicated to make and since it can be prepared well in advance and simply topped on the day it’s very easy. Just be careful how big you make it!)
Flavour/taste –10/10 (I really enjoyed this. Lovely and light, tasty festive flavours and it looked brilliant too)
This recipe is definitely a keeper, and may well become a regular feature of my future Christmases.
#17 – Help out a stranger with a random act of kindness
I included this item on The List because I felt that my 40 before 40 should not all be about me. When I wrote The List and included this challenge, I expected that in the following four years an opportunity to help would present itself to me; a ‘knight in shining armour’ moment, if you like. But – as I reflected in my recent Progress Update post, with just six months to go until my 40th nothing has really come up except very small things which were the kinds of things I would expect to help with in any case just to be polite and neighbourly.
In response to that Progress Update post, a friend suggested that I look into helping someone at my local Women’s Refuge – as she pointed out, giving £10 away would make very little difference to me but to a woman living in a refuge, receiving an extra £10 would mean far more than that.
Understandably, it is very difficult to find out information about Women’s Refuges. By their very nature refuges need to remain unseen and unknown; to protect the women and children sheltering there. They offer a hugely valuable service, providing not only a safe haven to women and children at serious risk of violence or other abuse, but also the necessary help, support and advice to build a life away from their abuser. Refuges provide not only emergency assistance in crisis but also longer term interventions to genuinely change lives.
Due to the need for confidentiality it isn’t possible to find out where refuges are and make donations directly to them, so I couldn’t do exactly what my friend had suggested and literally give a £10 note to a woman from the refuge. Rather than making a financial contribution online to a general charity helping women in this situation I was particularly keen to help a refuge in my local area. I was therefore pleased to be able to find a local branch of a charity, the Soroptimists, which works with my local refuge. Through them, I was able to arrange to donate a selection of goods, so I arranged a shopping trip.
I had been informed that the refuge needed store cupboard food (tins, packets and dried goods) and also basic toiletries and sanitary products. I chose to spend what I would normally spend on a monthly shop for me on buying items to donate to the refuge. I donated the following basics:
- Toothbrushes and toothpastes
- Deodorants
- Sanitary towels and tampons
- New underwear (in a selection of sizes)
- Dried pasta and rice
- Tins of fruit, vegetables, soup, tuna and tinned ready meals
I also bought a selection of Christmas treats because I felt that as well as the essentials, everyone deserves some Christmas cheer, so I added biscuits, chocolates, mince pies, Christmas cake, gingerbread and Christmas puddings to my trolley.
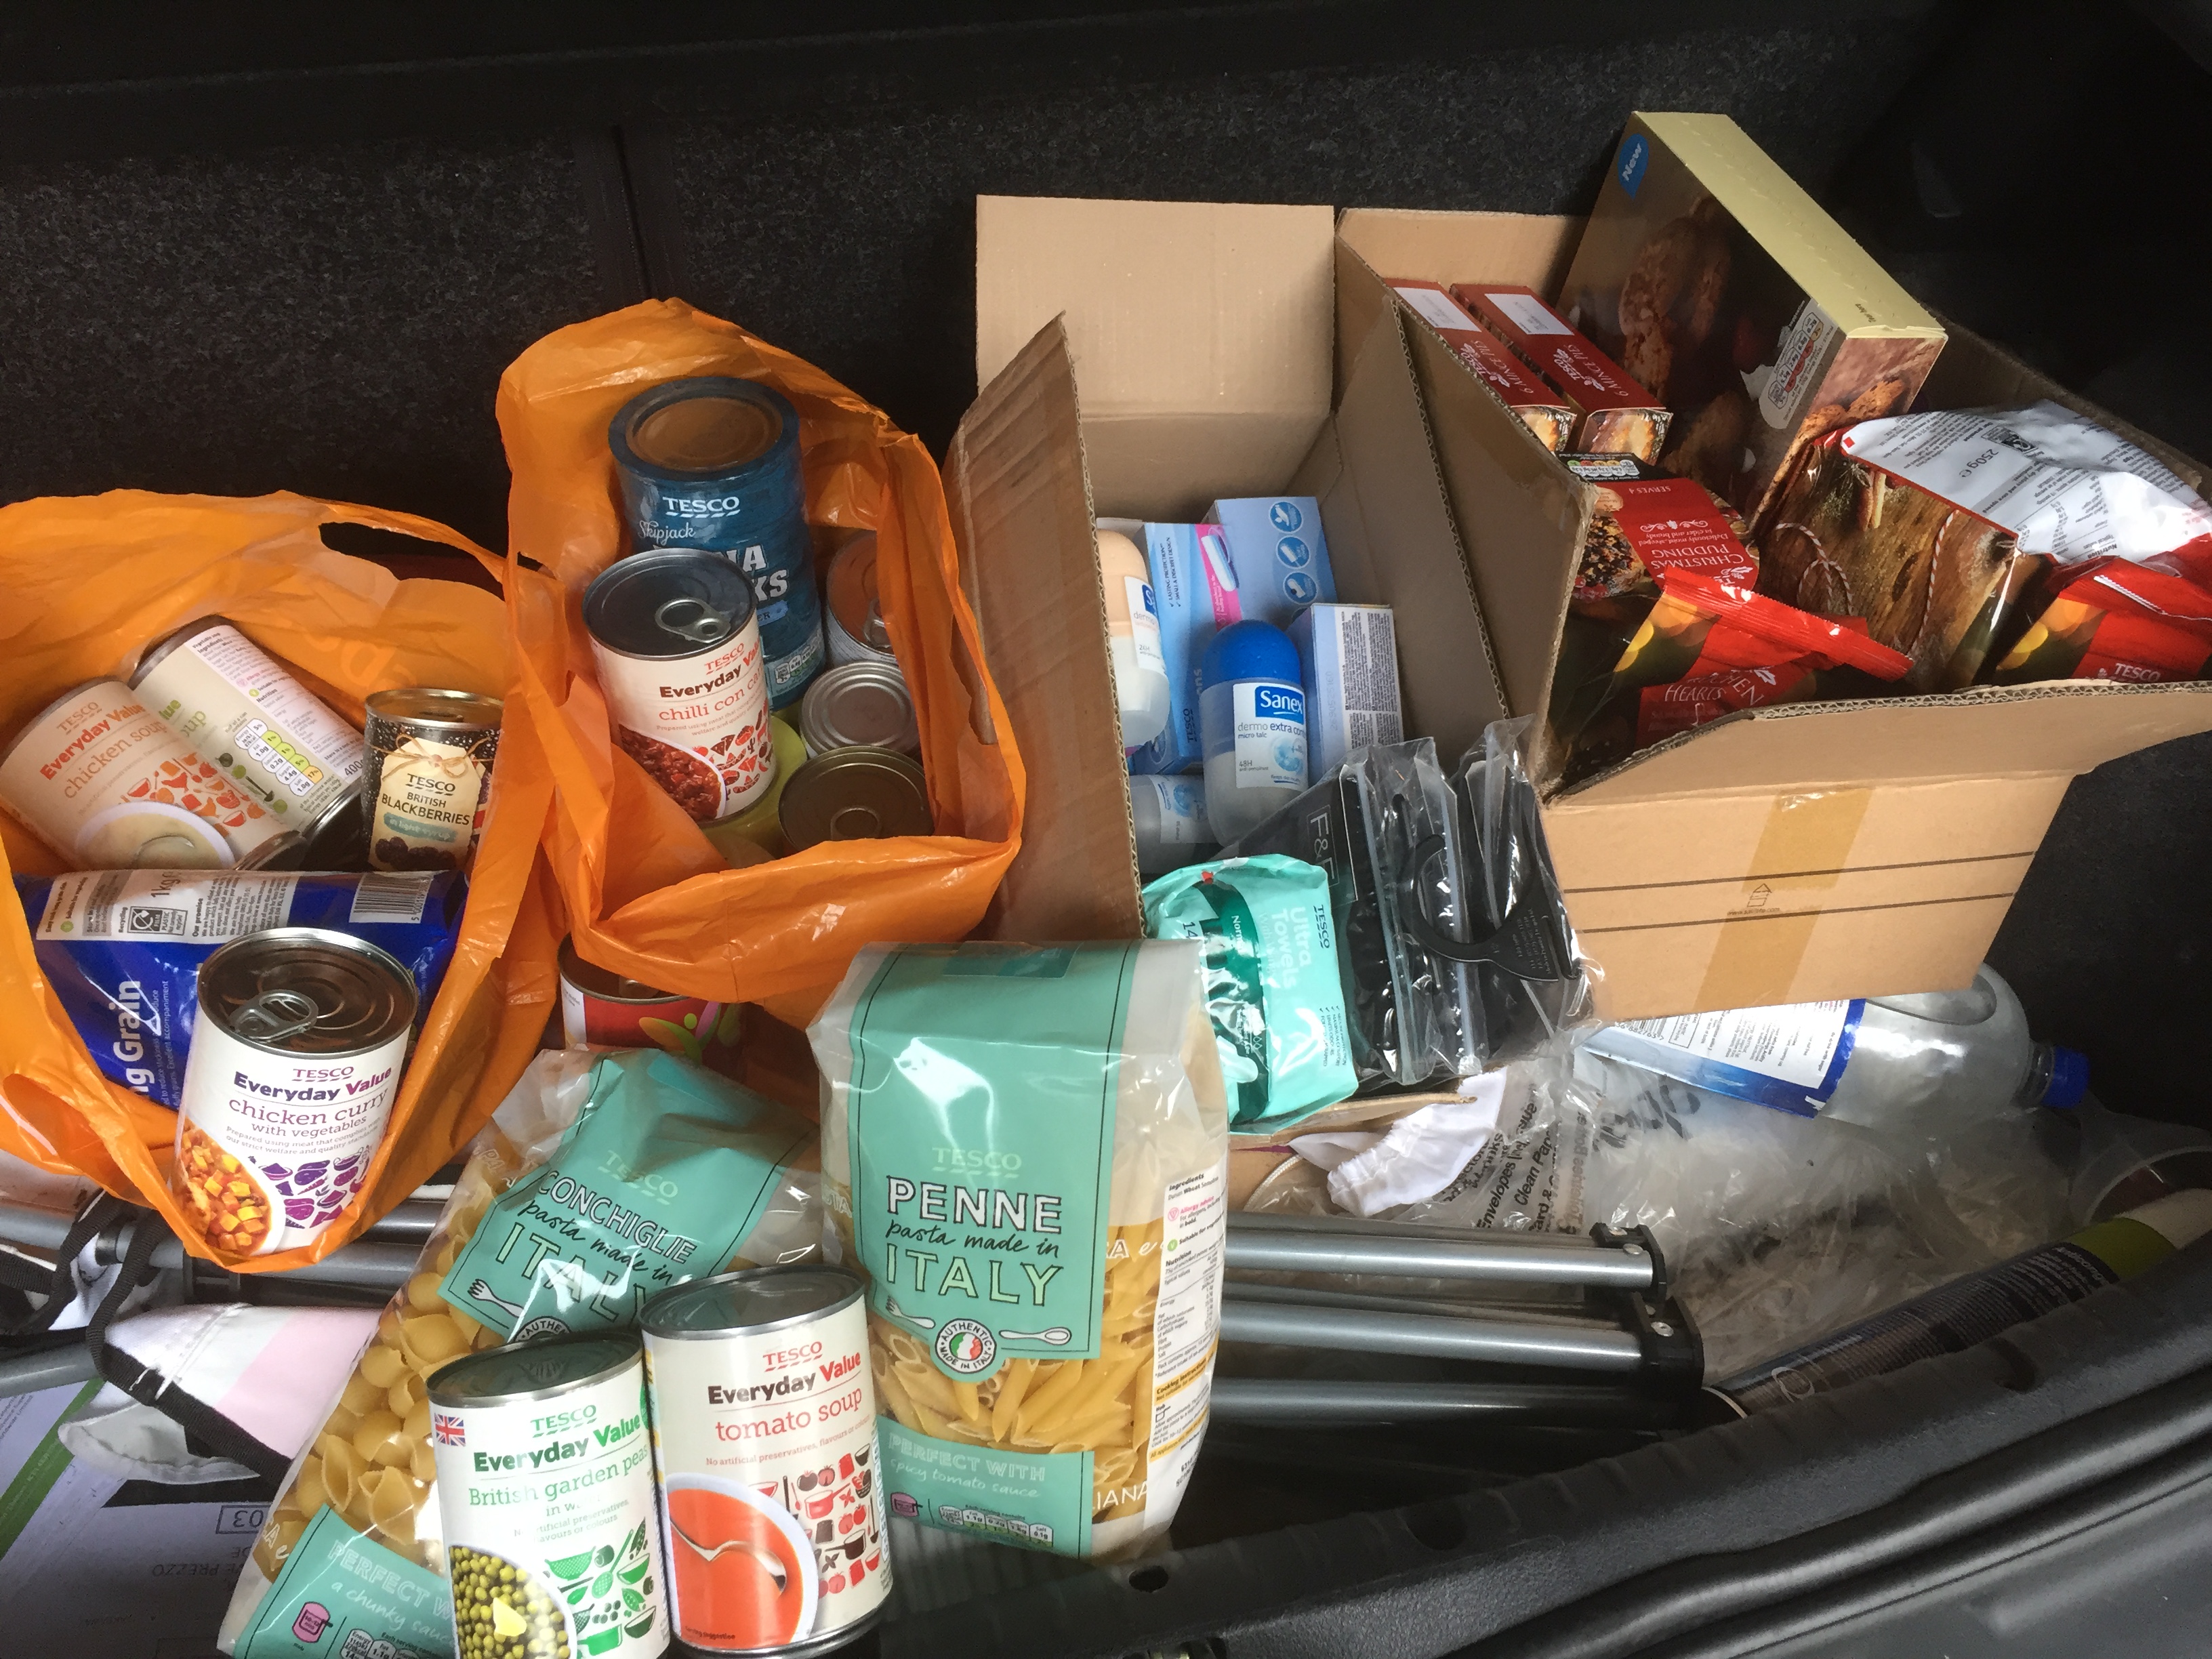
A boot-ful of essentials and treats to donate to the women’s refuge
I enjoyed the time I spent shopping for others. It felt good to be choosing things which I knew would make a difference, and especially selecting some nice things so that as well as the essentials there were also some treats. And in some ways, the fact that I will never know the recipients seems fitting – it’s not about me, this task was about helping someone I don’t know. Amongst the materialism and commercialism that Christmas has become it seemed appropriate to do something in the spirit of genuine giving, where there is absolutely no expectation of receiving in return. I hope that I have made a small difference to someone’s Christmas.
Information
It is possible to donate to refuges and outreach services through the national charity Refuge, who assist victims of domestic abuse, whether male or female: – http://www.refuge.org.uk/who-we-are/
The Soroptimists are an international organisation working to improve the lives of women and girls all over the world: http://sigbi.org/what-we-do/
#1 – 48 Recipe Challenge: Recipe 44 – Chicken Liver Parfait

The idea for this month’s recipe was born when the other half and I went out for dinner and he ordered Chicken Liver Parfait as a starter. This led to a conversation about the difference between a pâté and a parfait, which neither of us knew. I thought it would be to do with the ingredients – parfait is usually lighter and more mousse-like in texture, so I assumed it had cream added and was perhaps whisked to make it less dense.
But apparently not. Some pâté recipes have cream in, some don’t. Some websites suggest that a parfait is simply a pâté that is passed through a sieve to make it very smooth – whether before or after cooking. There also seems to be a debate about whether a pâté is cooked before it is assembled or afterwards e.g. is the method to cook the ingredients, blend the mixture (and possibly pass it through a sieve) before leaving it to set, or is the method to blend the ingredients, then cook the mixture in a bain marie. I came to the conclusion that basically both pâtés and parfaits are cooked first then set in the fridge, and anything which is blended before being cooked and set in a bain marie is actually a terrine. If you want to really confuse yourself though, check out this post: http://nandchef.blogspot.co.uk/2013/05/definition-of-pate-and-terrines.html
As I’d spent so long looking this up and reading different pâté recipes I thought I’d have a go at making one. It’s a good choice for the 48 Recipe Challenge because not only is it a method I’ve not used before, it’s also a new ingredient for me. Normally I won’t eat offal so I’ve never cooked with it but for some reason I have a particular love for Chicken Liver pâté. In addition to my dislike of offal, I had an idea that pâtés were difficult and time consuming to make, but having read through various recipes, it seemed that actually is wasn’t as difficult to do as I had imagined it might be.
Having tried it, I can safely say it certainly was not easy. Well, actually that’s not entirely fair. It wasn’t a difficult process per se, but it was time consuming. I had to trim the sinew off the livers (not a pleasant job, they’re really slimy), chop the shallots, crush the garlic, fry the livers, melt the butter to soften the onions and garlic in, deglaze the pan with brandy, add chopped herbs and blend the lot. As I had decided to make a parfait, I then needed to pass the mixture through a sieve. After 15 minutes of that and getting nowhere fast, I soon got bored; so out of five assorted sized ramekins I have managed to produce one of chicken liver parfait and four of chicken liver pâté…
Then I had to make the jelly for the top. Often pâtés are topped with butter but I’d found this recipe: http://pleasedontkissthecook.blogspot.co.uk/2012/12/chicken-liver-pate-better-late-than.html using a port jelly instead, which I thought sounded good. Pâté does need to be sealed with something (either butter or a jelly) because otherwise the surface oxidises, which both makes it go grey and therefore look unappetising but also affects the taste. I’m pleased to report that the jelly was very simple to make and poured easily onto the surface of the pâté before setting well in the fridge.

Chicken livers being flambéd with brandy
As you may have guessed, I didn’t enjoy the process of making the pâté. The part where I had to flambé the brandy to burn the alcohol off was fun, but I really disliked handling the chicken livers and everything took soooo long. What initially seemed a simple, straightforward recipe actually took me over 3 hours to complete, including the clearing up (and this does use quite a bit of equipment). If I’d continued with the ‘passing through a sieve’ lark to make it all into parfait I reckon it would have easily taken another hour at least! Even getting the pâté into the ramekins was challenging – it went all up the sides and was very difficult to smooth off.

Untidy Chicken Liver Pâté in ramekins
So, my conclusion on this recipe is that I probably wouldn’t bother again. It took a lot of time, made a lot of mess and therefore is only worth it in my book if it produces something which tastes amazing. On the day I made it, this pâté was very dry and dense, and particularly ‘livery’. (When I say dry, think of that peculiar dryness that comes from fresh cranberries, where it sort of sucks all the moisture out of your mouth.) The pâté also had that really noticeable metallic tang that is everything I don’t like about offal. I was really disappointed, having put all that effort in.
The recipe said that the pâté improved with age, so on the following day I gamely gave it another go and to my surprise it was slightly more palatable; somehow less drying and less liver-y. Fingers crossed this trend continues over the next couple of days, otherwise given my dislike of offal, and the fact that I haven’t noticed a pronounced livery taste with commercial liver pâtés (which I actually really enjoy), unless this one improves dramatically in a short space of time I think I’ll stick with shop bought in future! (The port jelly is really good though, and the sweetness cuts through the dryness of the pâté.)

Chicken Liver Parfait with Port Jelly
Scores for this one are:
Healthiness – 5/10 (not necessarily unhealthy but just under 300 calories a ramekin for what is essentially a side dish or starter is quite a lot, and that’s before you add any bread to spread it on)
Ease of prep – 3/10 (I really didn’t like handling the liver and there was a lot of equipment to clear up afterwards)
Flavour/taste – 4/10 (perhaps it was just this particular recipe but this is shaping up to be much too livery for me, far more so than commercial chicken liver pâtés)
